ArcGIS Enterprise: Installing ArcGIS Portal 10.5 Beta
Introduction
In the next part of our blog, the GIS team here at Cranfield University, are setting up the newly launched ESRI ArcGIS Insights app. We are documenting the process of installing and testing this software, adding some helpful commentary on the way that should hopefully help others tread the same path! To get ESRI Insights for ArcGIS to work, there are a number of pre-requisites, which we will be installing step by step. These include:- ArcGIS Server 10.5Beta
- Portal for ArcGIS
- ArcGIS Web Adaptor
- ArcGIS Data Store
- An instance of MS SQLServer Database
- A JDBC 4.0 Compliant driver
ArcGIS Portal 10.5Beta
To get going with Portal, we copied over the Portal tarfile from the early adopter site ‘Portal_for_ArcGIS_Linux_105_beta1.tar.gz’, which contains the installation files for the Portal installation. This tar/gz file contains a folder called ‘Documentation’ – within which is a web/html set of instructions. We found it useful to extract these files off to a separate computer for consultation as the process unfolded. From the earlier ArcGIS 10.5 Beta Server installation, we had already downloaded to our installation folder (our home directory on the test server) the sample provisioning authorisation file provided ‘ArcGISforServerAdvancedEnterprise_Server_105alpha.prvc’. We had edited the header for this file with our details, but apart from that we left the codes alone. The next step was to unpack the installation media, thus:~> gunzip Portal_for_ArcGIS_Linux_105_beta1.tar.gz
~> tar –xvf Portal_for_ArcGIS_Linux_105_beta1.tar
This creates a folder ‘PortalForArcGIS’ with all the installation media in it ready to go. From here, we ran the setup programme, thus:
~> cd PortalForArcGIS
~> ./Setup -l yes -m console
Note the use of the console mode installation
This seemed to run OK, but we noticed a warning flagged up.
========================================================================
                 Portal for ArcGIS 10.5 Diagnostic Tool
                          Hostname: SERVER NAME
========================================================================
 DIAG000: Check for installation as root                       [PASSED]
 DIAG001: Check for 64-bit architecture                        [PASSED]
 DIAG002: Check OS version                                     [PASSED]
 DIAG003: Check hostname for invalid characters                [PASSED]
 DIAG005: Check system limits                                  [PASSED]
 DIAG004: Check installed packages                             [WARNING]
 DIAG016: Check Portal for ArcGIS ports                        [PASSED]
 DIAG024: Check localhost resolution                           [PASSED]
------------------------------------------------------------------------
There were 0 failure(s) and 1 warning(s) found:
WARNINGS:
------------------------------------------------------------------------
*** DIAG004: The following required packages were not found:
	dos2unix
‘dos2unix’ huh? OK, so we will clearly need that too. The old PC/Unix text file end of line issue – this is nothing to do with ESRI’s software. Dos2Unix is just a useful utility to help move text files between the various end of line formats.
We installed the dos2unix tool by compiling the source code and installing it manually and testing it was working OK – but we continued to see the same warning message from Portal. Puzzling – then we read the warning again – it says ‘package’ not found. OK it is looking at the package manager inventory to see what is installed. We re-installed dos2unix with the package manager ‘yum’.
~> yum install dos2unix
Note that yum is the redhat equivalent of ‘apt-get install’
That all worked fine and the Portal check passed OK. The installation of Portal now continued. The terms and conditions are shown for review, and the default locations (home/arcgis) – we accepted these.
Portal Authorisation
As part of the installation, we provided the explicit path to the provisioning file made available as part of the beta download ‘PortalforArcGISServer_105alpha.prvc’. However, this was not accepted, and so we needed to try again using the script authorisation tool ‘authorizeSoftware’ provided in the installation. However, remembering we also had this issue when installing Server, and how we fixed that, we edited the provisioning file header with our own details, saving to a new file ‘PortalforArcGISServer_105alpha_edited.prvc’. Note that using ‘authorizeSoftware -f’ allows a later application of a provisioning file to an installation, thus:~/arcgis/portal/tools> ./authorizeSoftware -f /home/gisadmin/PortalforArcGISServer_105alpha_edited.prvc
~/arcgis/portal/tools> ./authorizeSoftware -s
--------------------------------------------------------------------------
Starting the ArcGIS Software Authorization Wizard
Run this script with -h for additional information.
--------------------------------------------------------------------------
Product Ver ECP# Expires
-------------------------------------------------
portal_1000 101 ecp906762680 30-jan-2017
[shows all software licenced]
So far so good, the software is all installed and licenced. Now time to fire up Portal for the first time:
We entered the URL of the server:
https://localhost:7443/arcgis/home
(substitute ‘localhost’ for the fully qualified URL of your server)
At first this address did not work. We realised that this was again as the firewall needed updating for this port number (7443), as it was blocking it by default. A quick few edits in ‘lokkit‘ later and we are up and running.
~> sudo lokkit --port= 7443:tcp --update
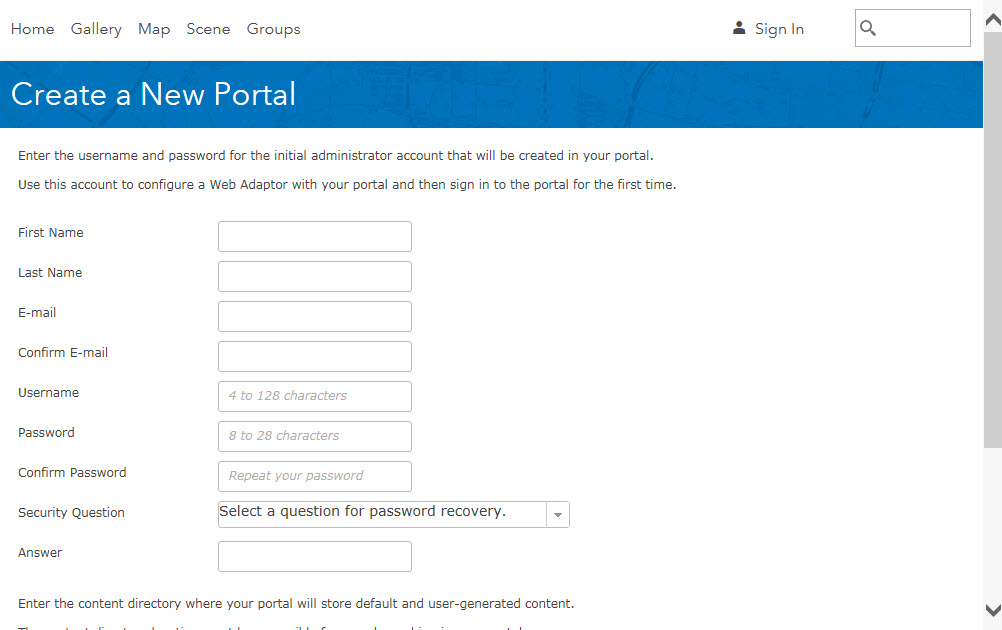
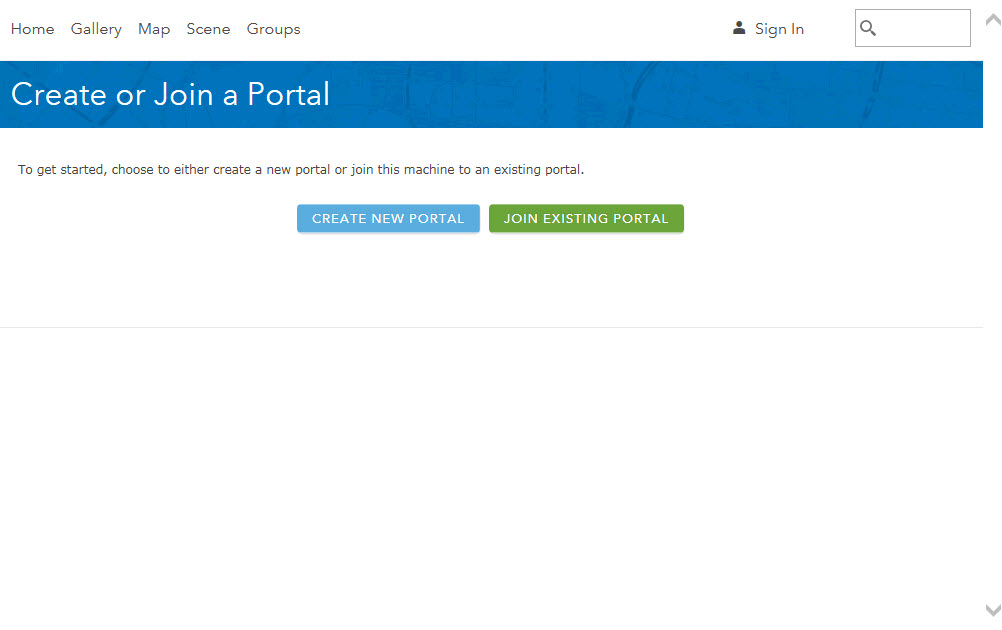 As a new install, we selected ‘Create new Portal’, then completed the form presented.
Web Adapter
ESRI say ‘ArcGIS Web Adaptor is a required component of Portal for ArcGIS which allows you to integrate your portal with your existing web server and your organization’s security mechanisms’, noting that ‘the ArcGIS Web Adaptor (Java Platform) on Linux allows you to integrate your existing Java-based web server with ArcGIS Server and Portal for ArcGIS.’ So we need to install Web Adapter too. The gz/tar file for Web Adapter was downloaded and unpacked as with the earlier archive distribution files.~> gunzip Web_Adaptor_Java_Linux_105_beta1.tar.gz
~> tar -xvf ./Web_Adaptor_Java_Linux_105_beta1.tar
This creates a folder ‘WebAdaptor’ with all the installation media in it ready to go. From here, we ran the setup programme, thus:
~> cd WebAdaptor
~> ./Setup -l yes -m silent
[ArcGIS 10.5 Web Adaptor (Java Platform) Installation Details]
UI Mode..................silent
Agreed to Esri License...yes
Installation Directory.../home/USER/arcgis/webadaptor10.5
Starting installation of ArcGIS 10.5 Web Adaptor (Java Platform)...
...ArcGIS 10.5 Web Adaptor (Java Platform) installation is complete.
Note the ‘-m’ silent mode setting used in the setup.
So at the end of this blog, we now have ArcGIS Server, ArcGIS Portal and the WebAdapter all up and running.
Lastly, we can make sure all the ports we need are opened correctly through the firewall.
~> sudo service iptables status
In the next blog, we will continue installing the other pre-requisite software tools for ESRI Insights for ArcGIS.
Thanks for reading!]]>