Here at Cranfield University we are putting in place plans related to the new ‘Living Laboratory’ project, part of our ‘Urban Observatory’. This project sits within the wider UKCRIC initiative, across a number of universities. Of the many experiments in development, we are gathering environmental data from IoT devices and building data dashboards to show the data and related analyses. One of our projects will be to place environmental sensors in our lecture rooms and public spaces to allow our facilities team to monitor conditions across the campus. In this blog, we show how this project is starting to take shape, and in so doing explain how we are connecting the Particle Photon device up with Bosch’s amazing multifunction BME680 sensor.
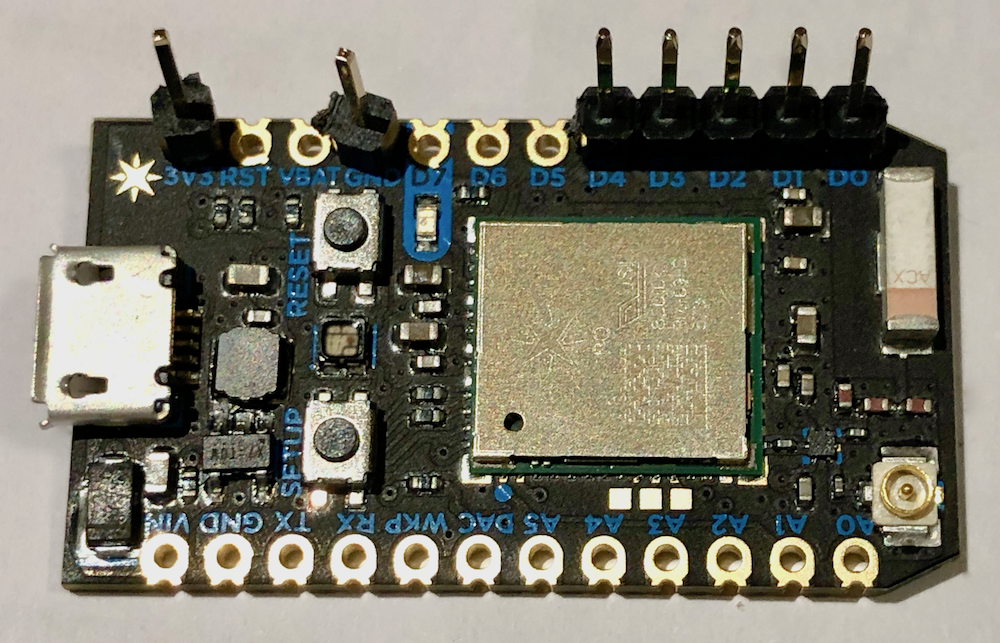
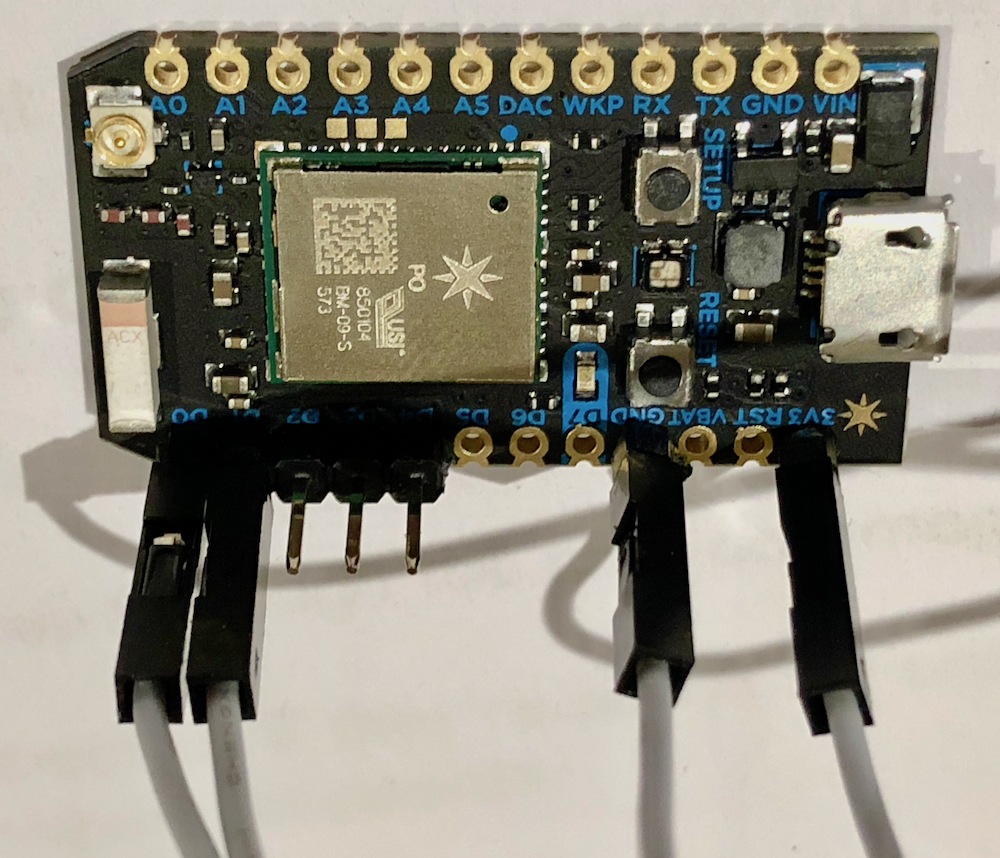
The controller we use is the Particle Photon, described in an earlier post. We started with a device without header poles, and then soldered in the ones we will use [D0, D1, +ve, Gnd]. The Photon was then connected to the WiFi network, following the instructions on the particle website Quick Start Guide.
Hardware
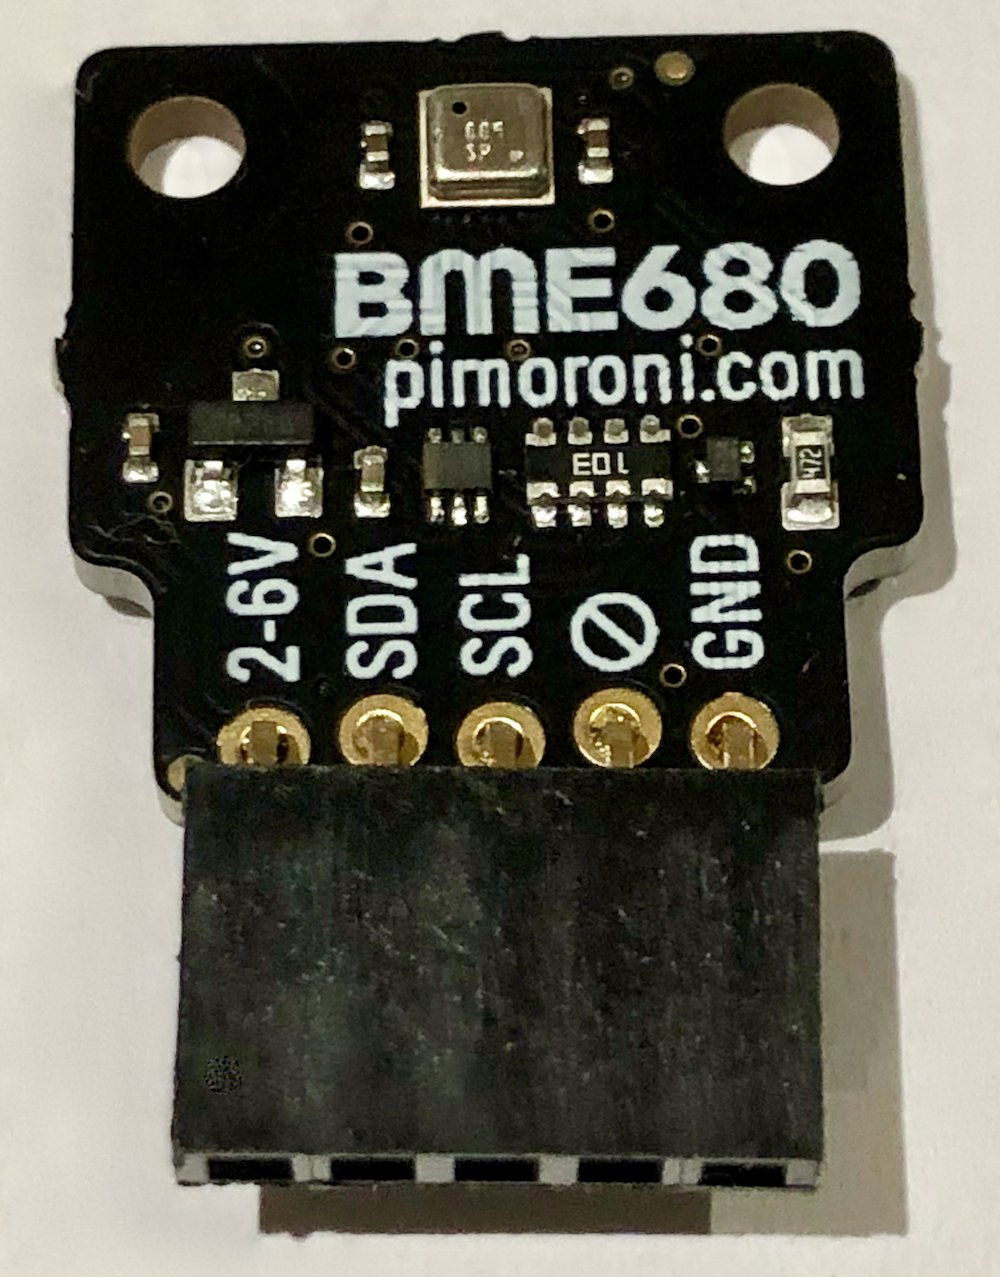
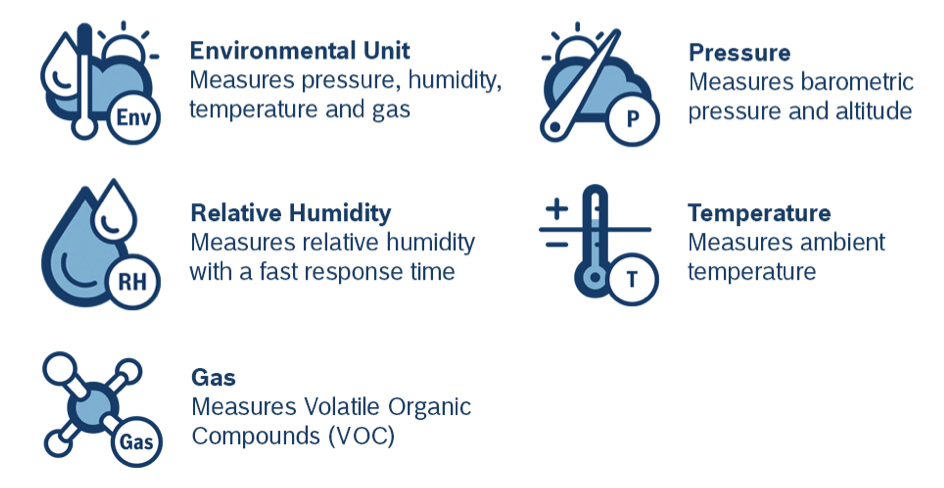
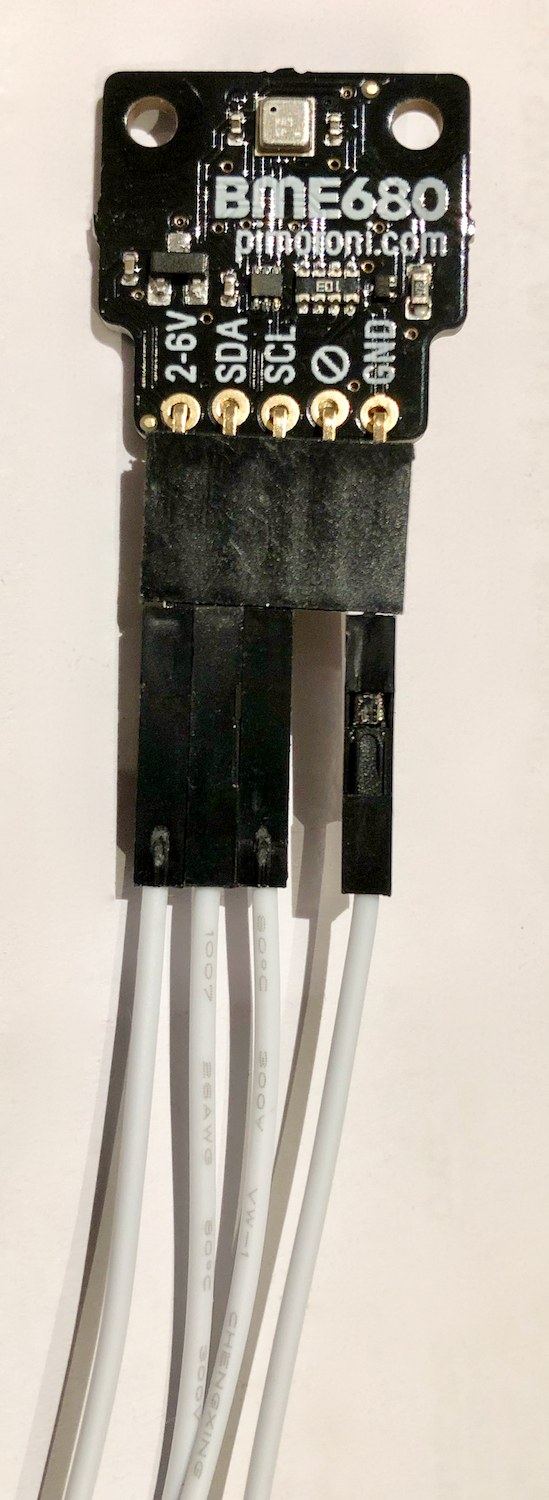
Next we used a Bosch BME680 sensor. This is able to measure temperature, pressure, humidity, and indoor air quality (IAQ) – the device currently returns gas resistivity in KOhms, rather than IAQ. It is also able to use the i2C interface, which only needs two connections, plus power (4 cables). Here the connection sockets are shown having been soldered in.
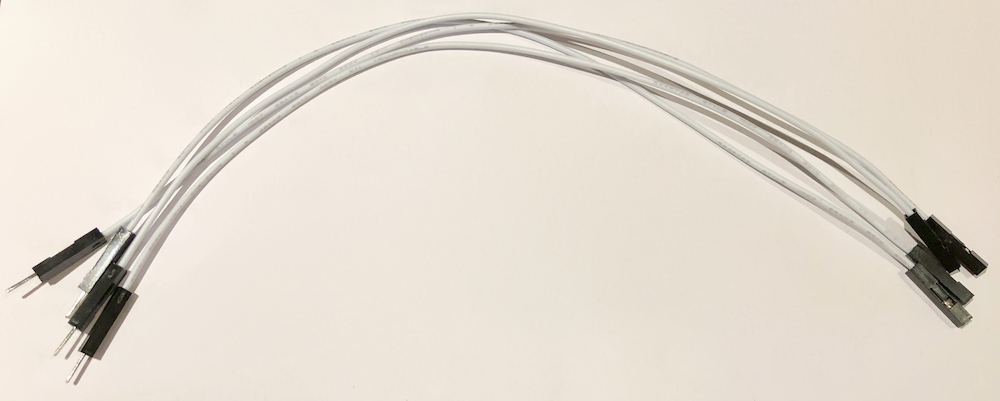
We then prepared four appropriate cables.
and then wired the devices up. The wiring connections used were:
| Photon | BME680 |
|---|---|
| D0 | SDA |
| D1 | SCL |
| 3.3V | 2-6V |
| GND | GND |
Code
Next, we opened the Particle Photon oneline cloud Web IDE. We created a new app, and located the Adafruit BME680 library and sample code.
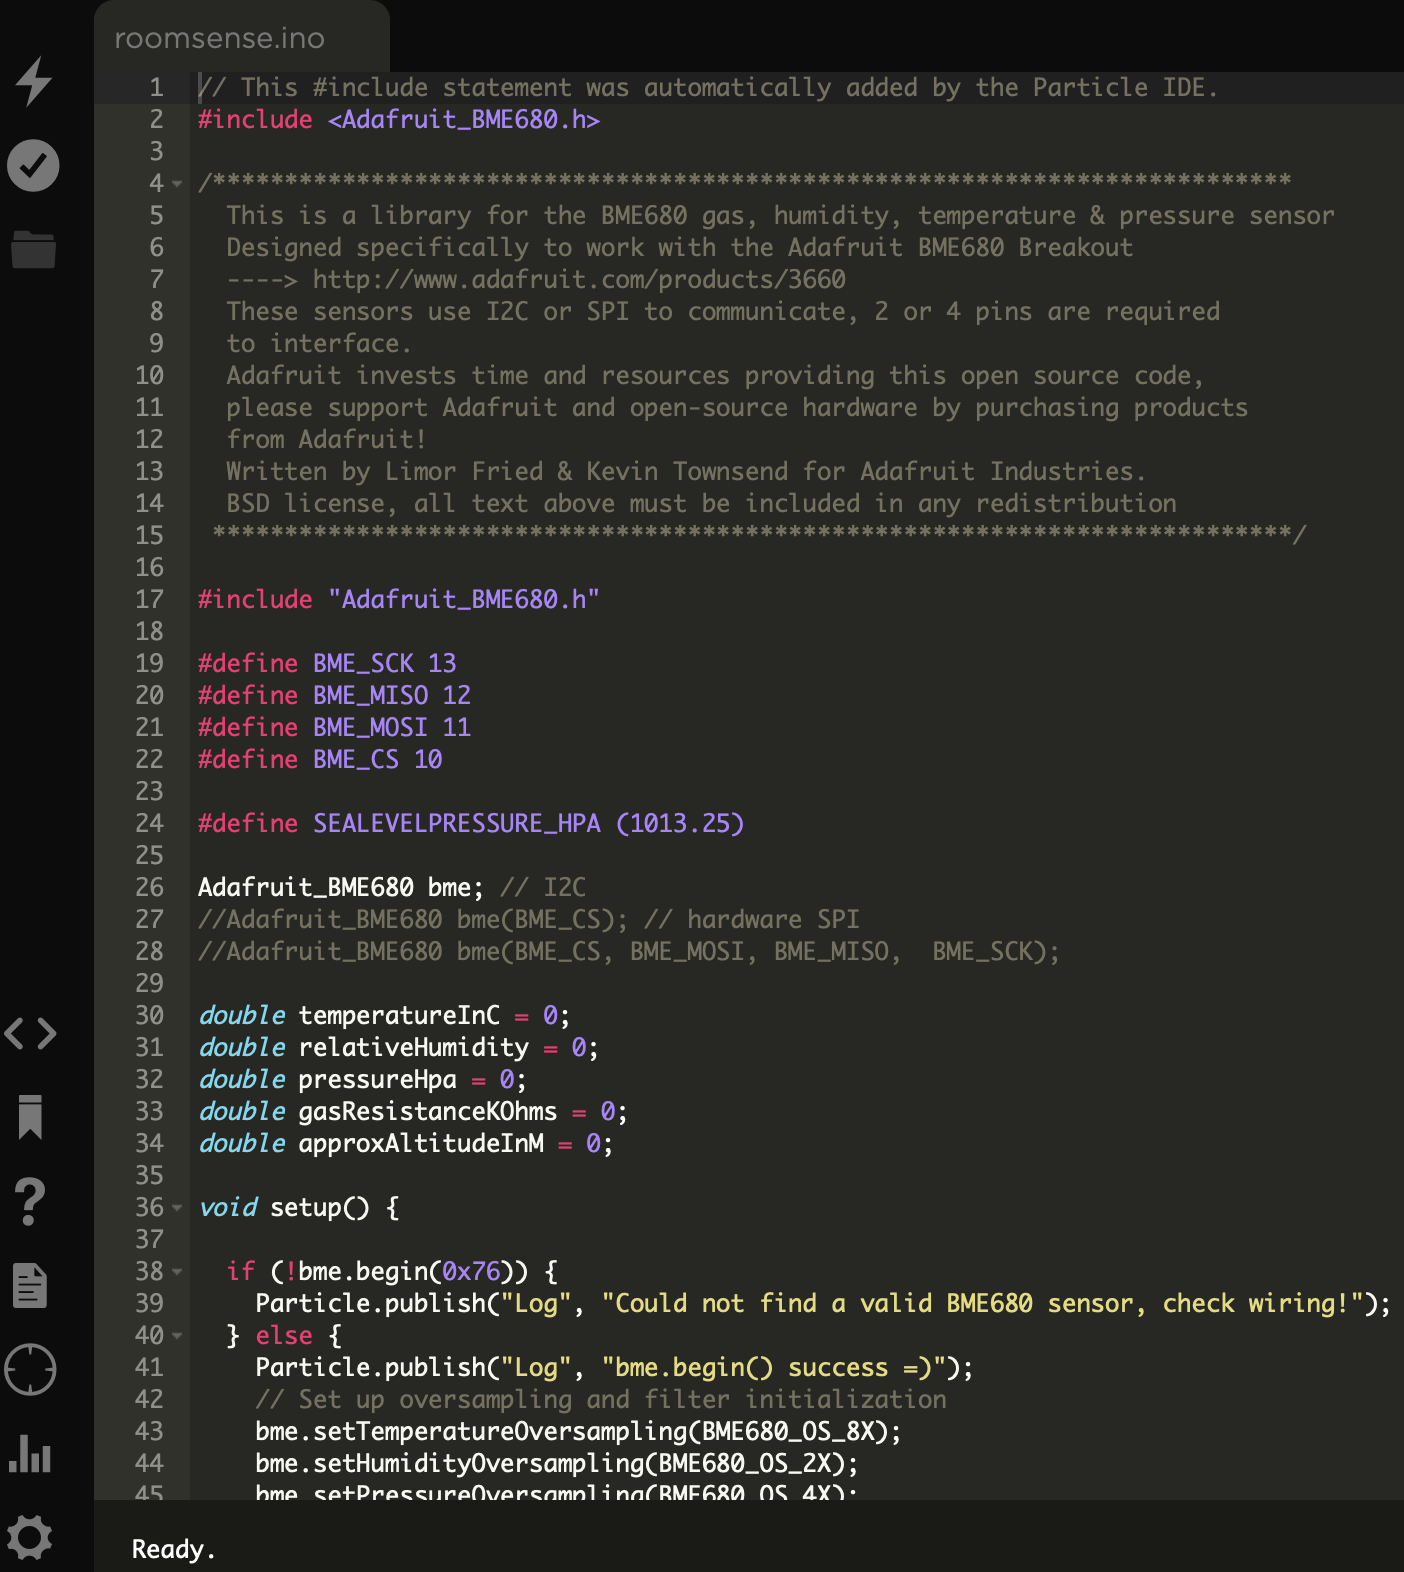
The full code is presented below.
/***************************************************************************
  This is a library for the BME680 gas, humidity, temperature & pressure sensor
  Designed specifically to work with the Adafruit BME680 Breakout
  ----> http://www.adafruit.com/products/3660
  These sensors use I2C or SPI to communicate, 2 or 4 pins are required
  to interface.
  Adafruit invests time and resources providing this open source code,
  please support Adafruit and open-source hardware by purchasing products
  from Adafruit!
  Written by Limor Fried & Kevin Townsend for Adafruit Industries.
  BSD license, all text above must be included in any redistribution
 ***************************************************************************/

#include "Adafruit_BME680.h"

#define BME_SCK 13
#define BME_MISO 12
#define BME_MOSI 11
#define BME_CS 10

#define SEALEVELPRESSURE_HPA (1013.25)

Adafruit_BME680 bme; // I2C
//Adafruit_BME680 bme(BME_CS); // hardware SPI
//Adafruit_BME680 bme(BME_CS, BME_MOSI, BME_MISO,  BME_SCK);

double temperatureInC = 0;
double relativeHumidity = 0;
double pressureHpa = 0;
double gasResistanceKOhms = 0;
double approxAltitudeInM = 0;

void setup() {

  if (!bme.begin(0x76)) {
    Particle.publish("Log", "Could not find a valid BME680 sensor, check wiring!");
  } else {
    Particle.publish("Log", "bme.begin() success =)");
    // Set up oversampling and filter initialization
    bme.setTemperatureOversampling(BME680_OS_8X);
    bme.setHumidityOversampling(BME680_OS_2X);
    bme.setPressureOversampling(BME680_OS_4X);
    bme.setIIRFilterSize(BME680_FILTER_SIZE_3);
    bme.setGasHeater(320, 150); // 320*C for 150 ms

    Particle.variable("temperature", &temperatureInC, DOUBLE);
    Particle.variable("humidity", &relativeHumidity, DOUBLE);
    Particle.variable("pressure", &pressureHpa, DOUBLE);
    Particle.variable("gas", &gasResistanceKOhms, DOUBLE);
    Particle.variable("altitude", &approxAltitudeInM, DOUBLE);
  }
}

void loop() {
  if (! bme.performReading()) {
    Particle.publish("Log", "Failed to perform reading :(");
  } else {
    temperatureInC = bme.temperature;
    relativeHumidity = bme.humidity;
    pressureHpa = bme.pressure / 100.0;
    gasResistanceKOhms = bme.gas_resistance / 1000.0;
    approxAltitudeInM = bme.readAltitude(SEALEVELPRESSURE_HPA);

    // ThingSpeak Channel Info
    unsigned long myChannelNumber =999999;      //  From your ThingSpeak Account Info
    const char * myWriteAPIKey = "YOURAPIKEY";  //  From your ThingSpeak Account Info (API KEYS tab)

    String data = String::format(
      "{"
        "\"temperatureInC\":%.2f,"
        "\"humidityPercentage\":%.2f,"
        "\"pressureHpa\":%.2f,"
        "\"gasResistanceKOhms\":%.2f,"
        "\"approxAltitudeInM\":%.2f,"
        "\"key\":\"%s\""
      "}",
      temperatureInC,
      relativeHumidity,
      pressureHpa,
      gasResistanceKOhms,
      approxAltitudeInM,
      myWriteAPIKey);

    Particle.publish("Sensor", data, 60, PRIVATE, NO_ACK);

  }
  delay(10 * 1000);
}
Receiving data
Note the inclusion of the ThingsBoard API key ‘myWriteAPIKey’ into the JSON structure. ThingsBoard is used below.
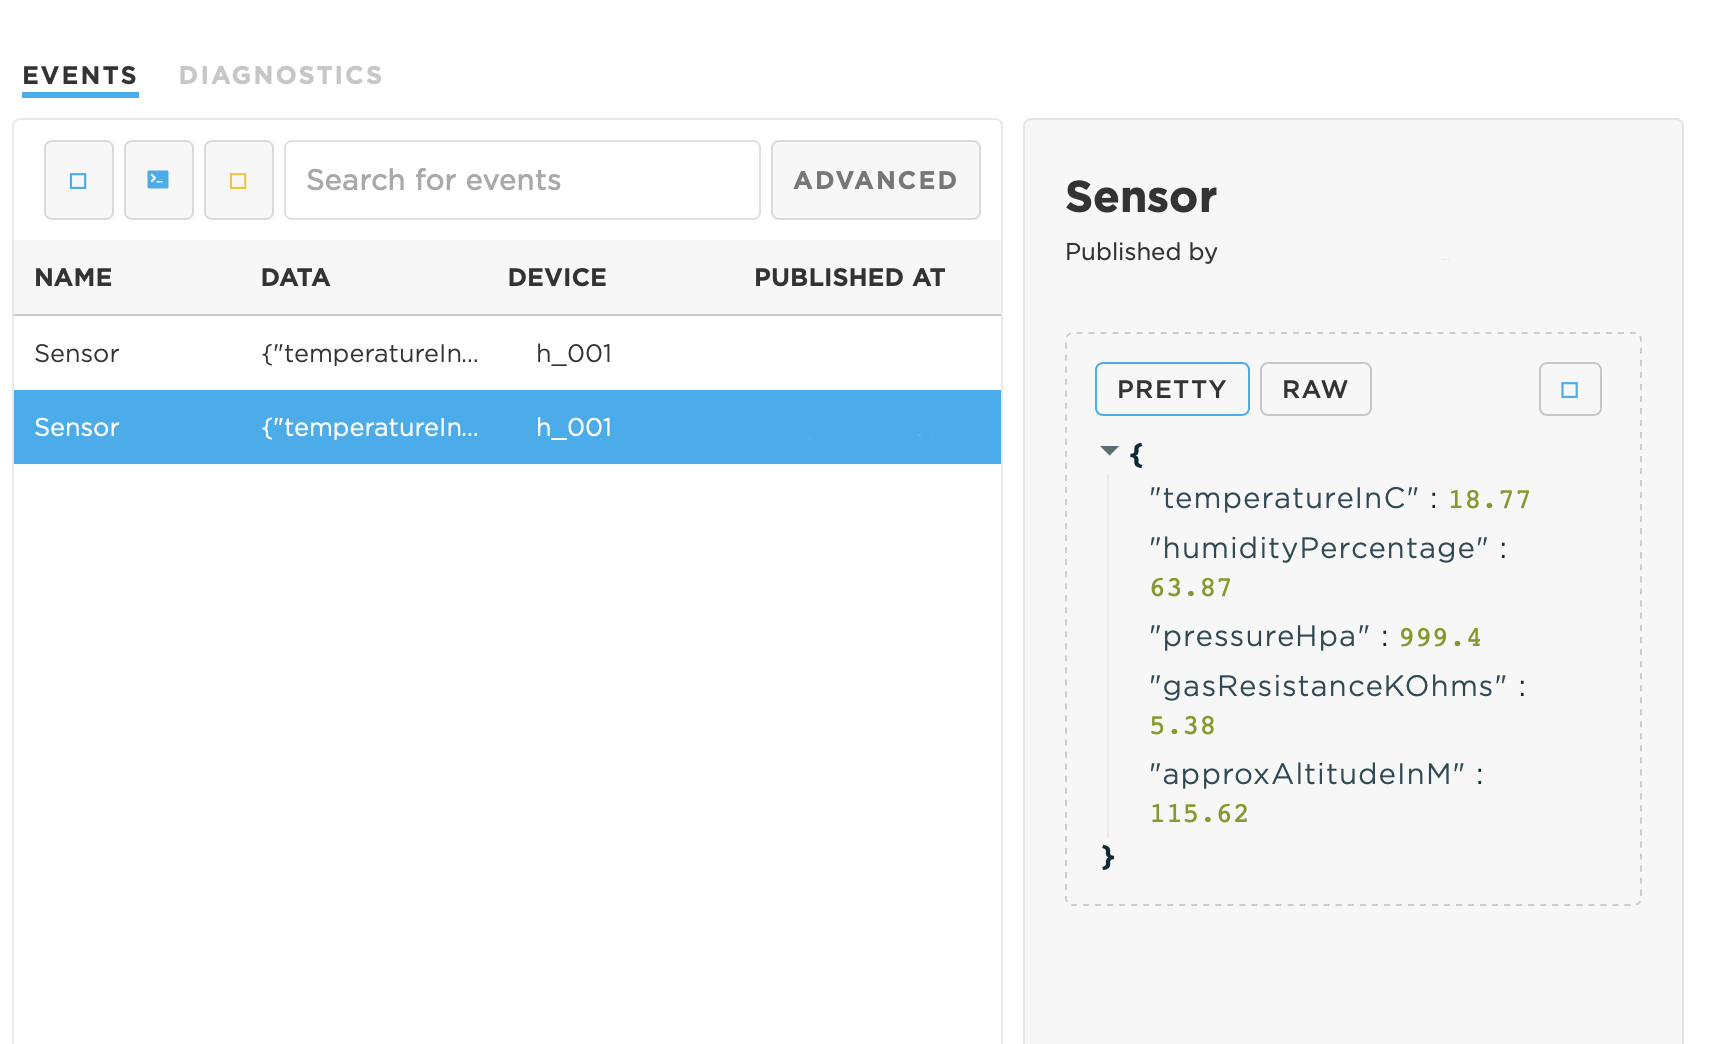
Once we verified and flashed this code to the new Photon, it was able to start generating data. It took about 20 minutes to stabilise readings. Data was then picked up from the Particle.publish command in the source code on the Particle Console view. The data JSON structure is shown being generated (key not shown).
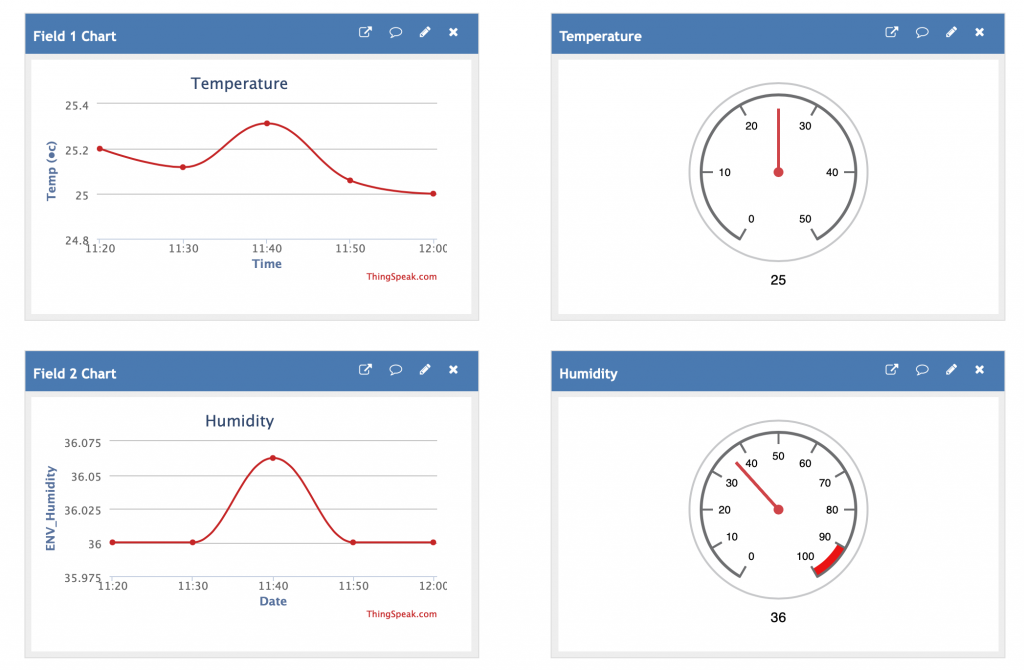
ThingSpeak Dashboard
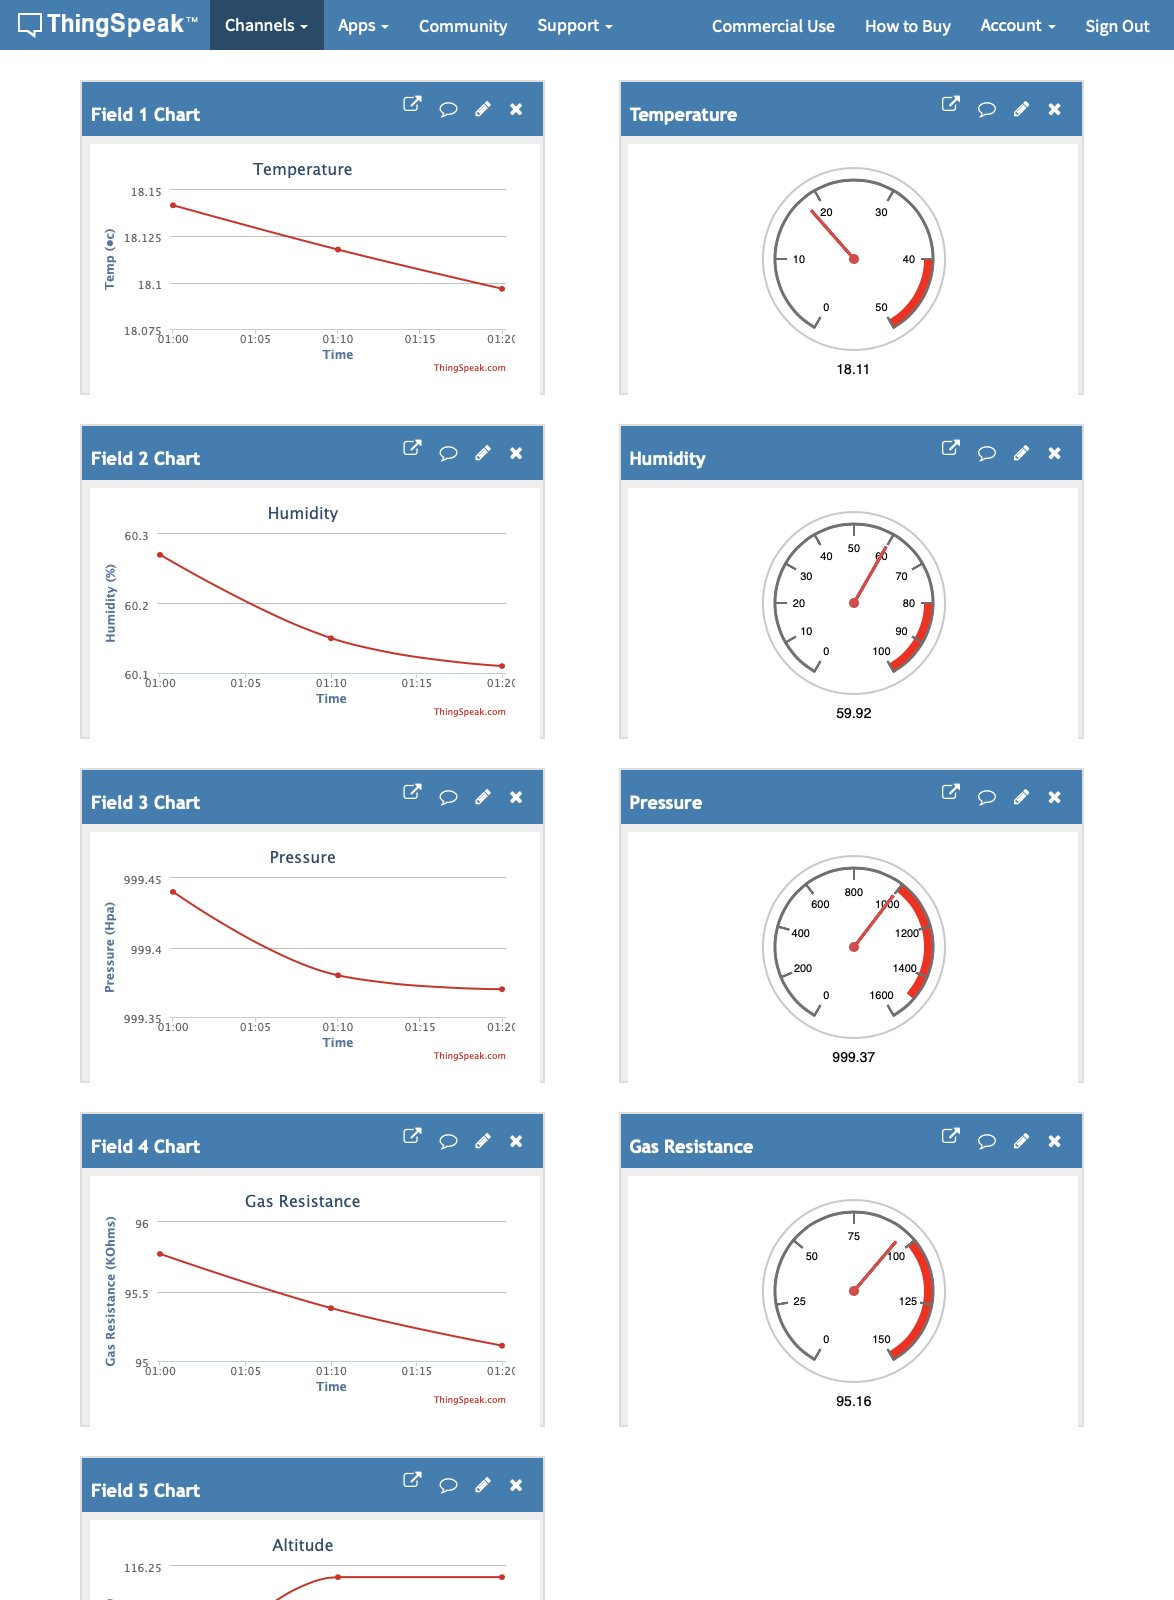
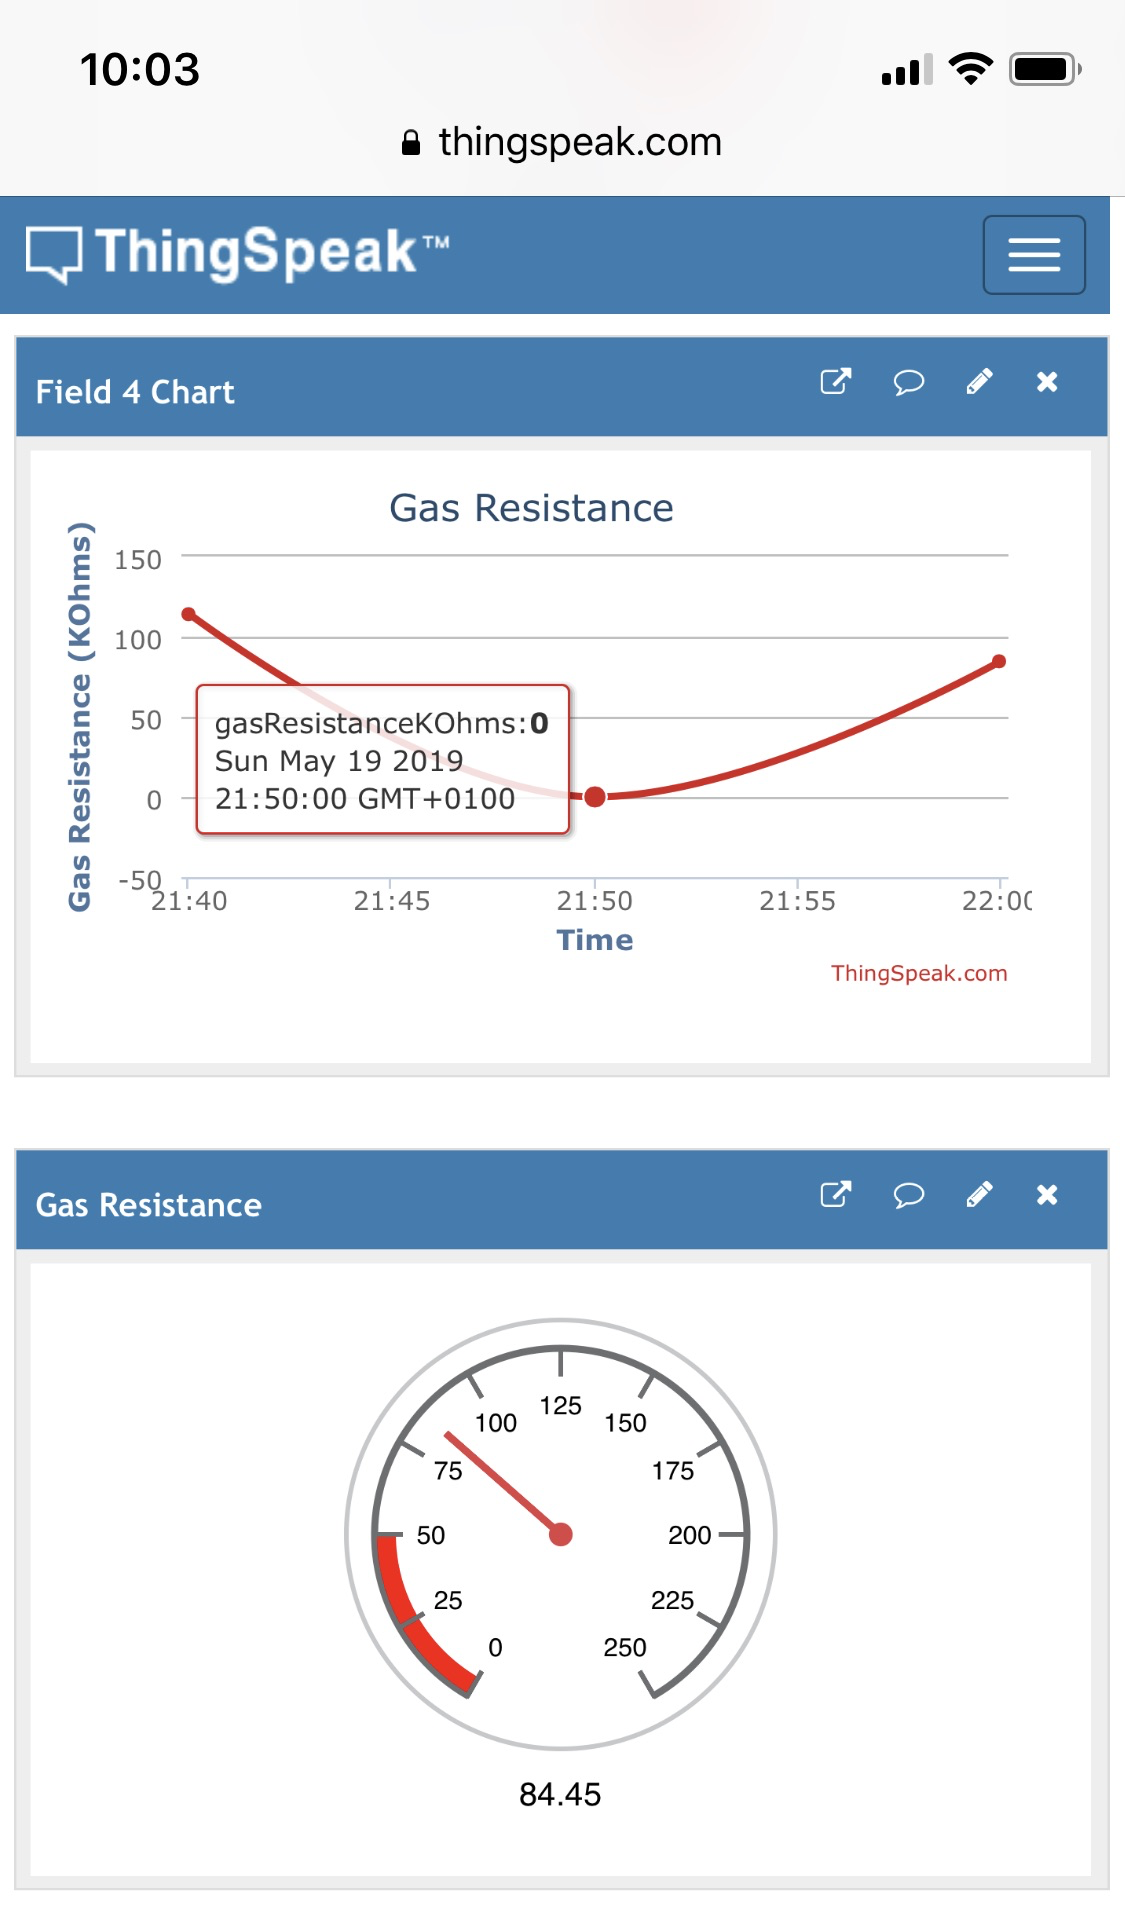
Finally, following the approach outlined in this earlier blog, we built a ‘Webhook’ integration from the Particle web Console to ThingSpeak, and added a new Channel to receive the data to create a dashboard.
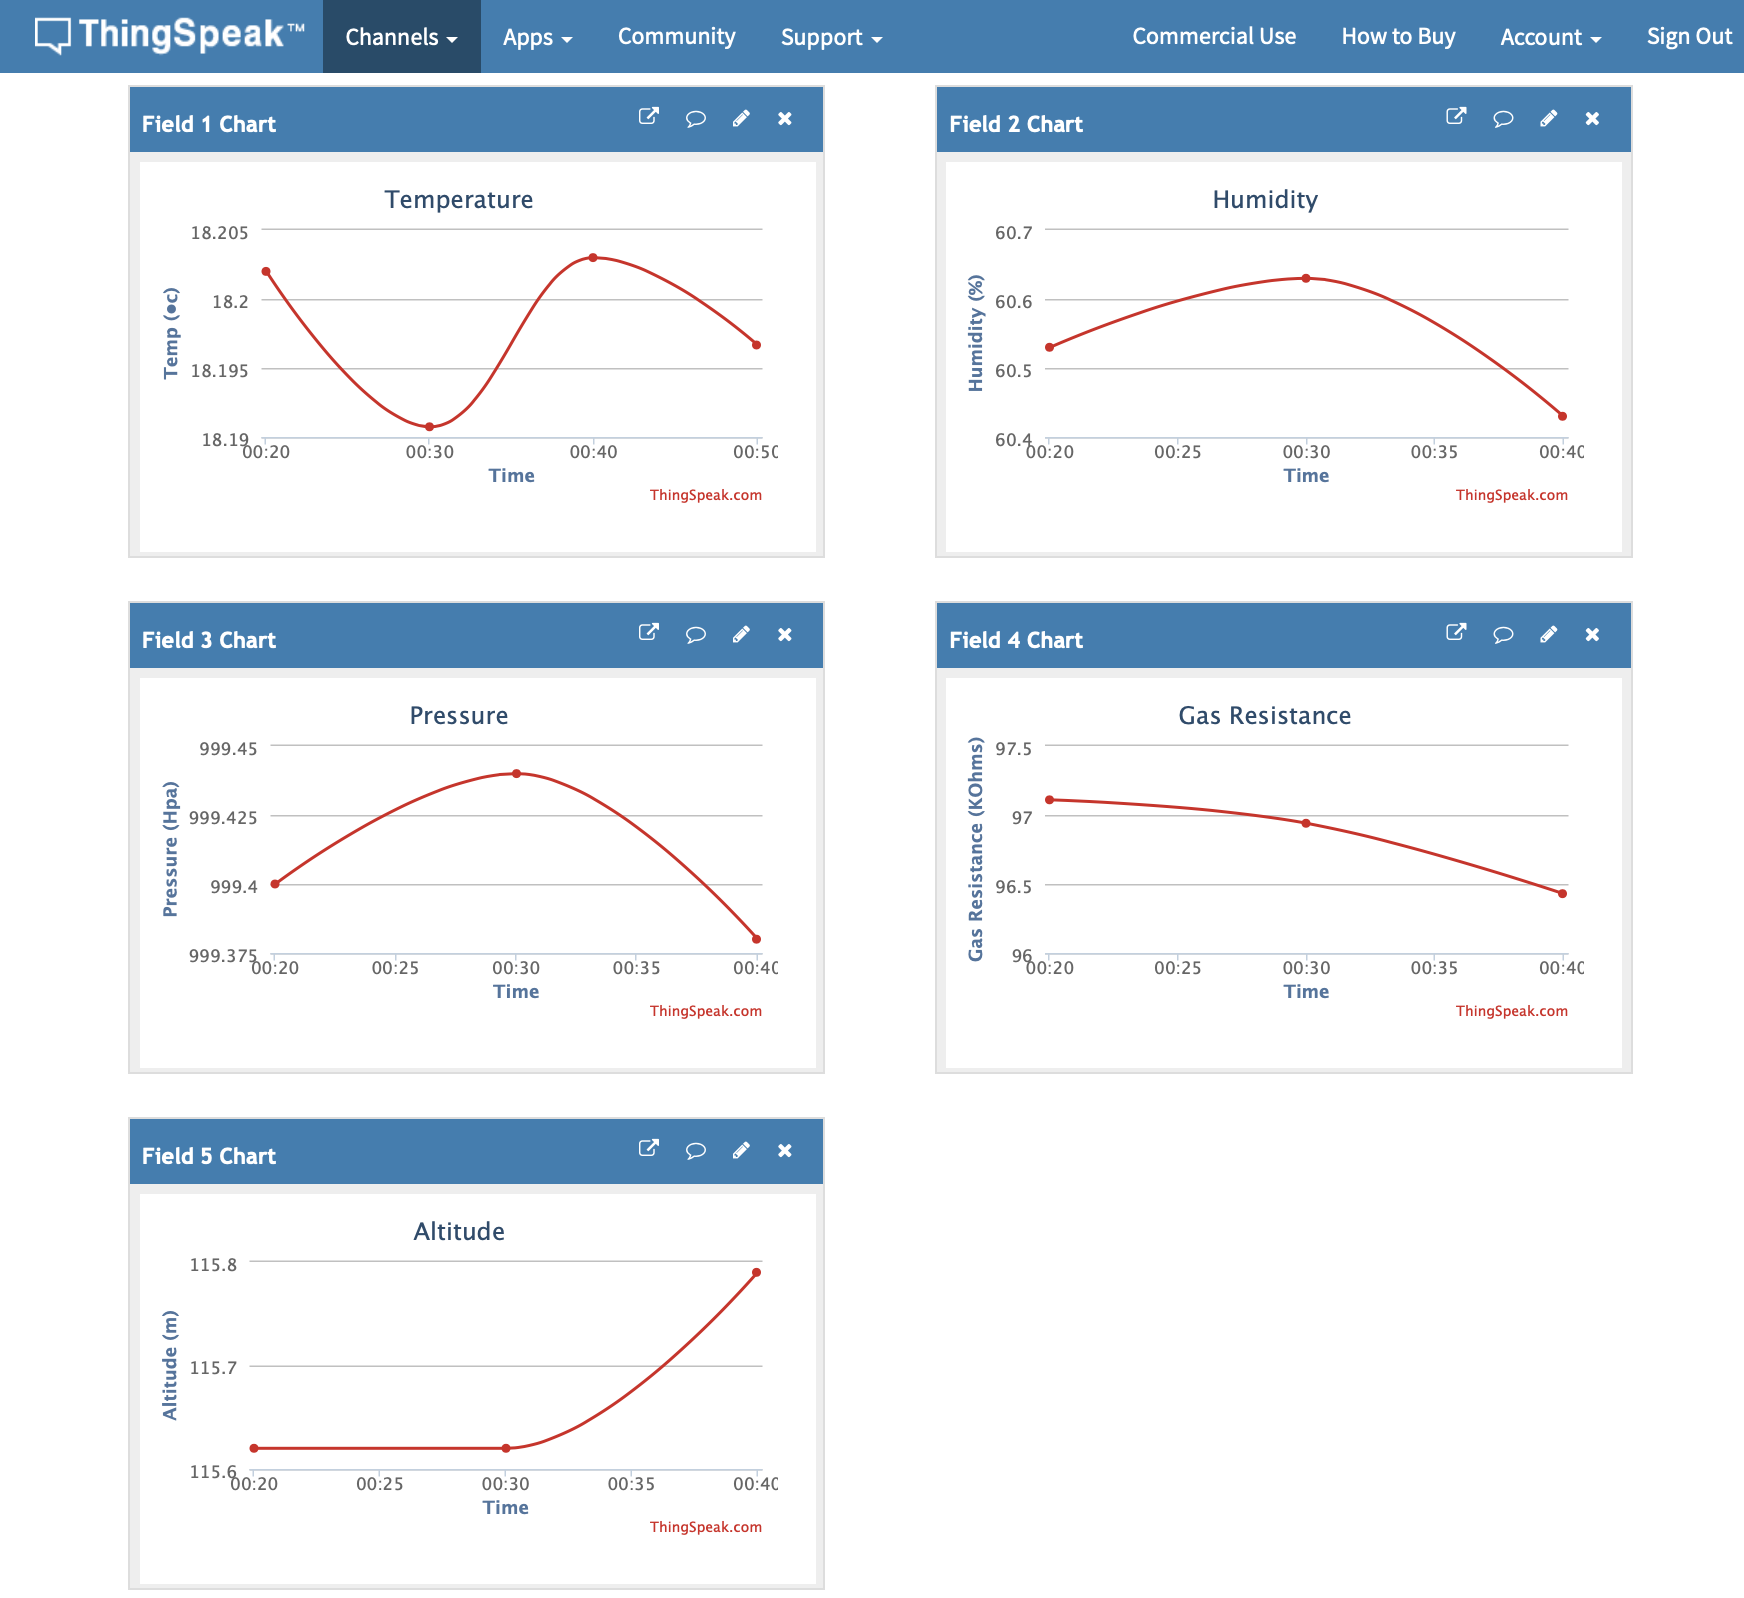
and as before the range of visualisations can be customised, and indeed the power of Matlab analytics can be blended in also.
Epilogue
This blog has shown how easy it is to get a Particle Photon working with a Bosch BME680 multifunction sensor. As can be seen, the sensor outputs a range of data streams, barometric pressure, humidity, temperature and gas, and of these it is the gas resistance level, from which an Indoor Air Quality (IAQ) can be calculated, that is of particular interest. To quote Bosch, ‘The gas sensor within the BME680 can detect a broad range of gases to measure indoor air quality for personal well being. Gases that can be detected by the BME680 include: Volatile Organic Compounds (VOC) from paints (such as formaldehyde), lacquers, paint strippers, cleaning supplies, furnishings, office equipment, glues, adhesives and alcohol.’ This opens up a range of applications for this sensor which, combined with our project to monitor continuously public areas around the campus, a lot of options. As the Bosch technical sheet notes, IAQ provides a value from 0-500, with the following classification:
| IAQ Index | Air Quality |
| 0 – 50 | good |
| 51 – 100 | average |
| 101 – 150 | little bad |
| 151 – 200 | bad |
| 201 – 300 | worse |
| 301 – 500 | very bad |
The current device and software library only returns gas resistance, but a future project can be to link this to the Bosch libraries that calculate IAQ. There is also an interesting thread on the Pi Moroni blog for achieving this oneself, and more information here also.
]]>