


![]() Purpose: Following on the earlier Raspberry Pi posts on this Cranfield University site, this cookbook explains how we got the Raspberry Pi to run on a network using a WiFi USB dongle.
Introduction
Although the default setup for the Raspberry Pi allows wired ethernet connections out of the box, it is useful to enable the Pi to work with WiFi. The first thing you need is to buy a suitable WiFi USB hardware dongle. Before purchasing this, be sure to visit the peripherals site at http://elinux.org/RPi_VerifiedPeripherals. Select one of the ‘Working USB WiFi Adapters’. We chose the inexpensive ‘USB Wifi Adapter for the Raspberry Pi’, sold by a number of vendors such as the ‘Pi Hut’ (http://thepihut.com/products/usb-wifi-adapter-for-the-raspberry-pi) and Amazon, etc.
Once you have this, insert into the Pi and boot up. When running, we followed the excellent instructions here (http://www.raspberrypi-tutorials.co.uk/set-raspberry-pi-wireless-network/). First, we see what devices are recognised on the USB port:
Purpose: Following on the earlier Raspberry Pi posts on this Cranfield University site, this cookbook explains how we got the Raspberry Pi to run on a network using a WiFi USB dongle.
Introduction
Although the default setup for the Raspberry Pi allows wired ethernet connections out of the box, it is useful to enable the Pi to work with WiFi. The first thing you need is to buy a suitable WiFi USB hardware dongle. Before purchasing this, be sure to visit the peripherals site at http://elinux.org/RPi_VerifiedPeripherals. Select one of the ‘Working USB WiFi Adapters’. We chose the inexpensive ‘USB Wifi Adapter for the Raspberry Pi’, sold by a number of vendors such as the ‘Pi Hut’ (http://thepihut.com/products/usb-wifi-adapter-for-the-raspberry-pi) and Amazon, etc.
Once you have this, insert into the Pi and boot up. When running, we followed the excellent instructions here (http://www.raspberrypi-tutorials.co.uk/set-raspberry-pi-wireless-network/). First, we see what devices are recognised on the USB port:
lsusbThis listed our adapter as: Bus 001 Device 004: ID 148f:5370 Ralink Technology, Corp. RT5370 Wireless Adapter Although all drivers are supposed to be pre-loaded, even if you have the latest ‘Wheezy’, it is good practice to update the system to the latest set of drivers. To do this, type:
sudo apt-get update
sudo apt-get install
Once finished you can search for the new device in the APT package cache. We used this command:
sudo apt-cache search ralinkThe last word is the actual search string, here ‘ralink’. Before this worked, we had tried a few other strings like ‘RT5370’ – which had returned nothing. Note there is no ‘-‘ before the word search! Anyway, once we tried ‘ralink’ the search worked and it reported: firmware-ralink – Binary firmware for Ralink wireless cards Now we installed the latest drivers for our wifi key, thus:
sudo apt-get install firmware-ralinkOnce this whirred away and finished updating the drivers, we rebooted the computer:
sudo shutdown -r nowOnce the Pi was back up and running, we made sure the USB key was recognised:
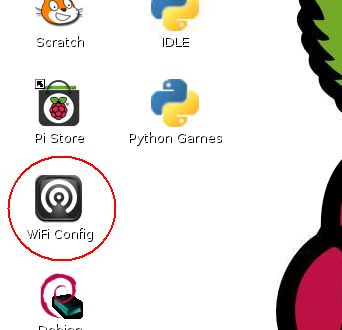
iwconfigHopefully you will see the ‘wlan0’ interface being listed. The next step is to configure the wireless key to work with the router. There are few options here. First you can manually configure everything, and secondly you can use the ‘WiFi Config’ tool on the Pi graphical login screen – as shown. The latter is certainly the easiest option.
 Running this config tool, the programme immediately spotted the ‘wlan0‘ adapter. Selecting ‘Scan’ enabled the programme to locate the SSID of the network router to connect to. Under the ‘Manage Networks’ tab, we then ‘edited’ the connection to add in the relevant security connection information (eg. WEP, WPA keywords etc ). The first ‘Current Status’ tab then showed a successful connection had been made to the router and an IP address successfully allocated by the router’s DHCP server.
Under the bonnet
So far so good – a working WiFi connection. However, we are using the Pi as a ‘LAMP’ database server (see http://www.geothread.net/building-a-lamp-server-on-the-raspberry-pi-computer/). A dynamic IP address is therefore not ideal if we want to connect to say the Pi MySQL server instance from other devices (e.g. iPhone). We therefore wanted to establish a ‘static’ IP address for the Pi and to do this we need to dive under the bonnet. First move to and edit the network configuration file (‘nano’ is a text editor, the ‘sudo’ runs nano as the root user):
Running this config tool, the programme immediately spotted the ‘wlan0‘ adapter. Selecting ‘Scan’ enabled the programme to locate the SSID of the network router to connect to. Under the ‘Manage Networks’ tab, we then ‘edited’ the connection to add in the relevant security connection information (eg. WEP, WPA keywords etc ). The first ‘Current Status’ tab then showed a successful connection had been made to the router and an IP address successfully allocated by the router’s DHCP server.
Under the bonnet
So far so good – a working WiFi connection. However, we are using the Pi as a ‘LAMP’ database server (see http://www.geothread.net/building-a-lamp-server-on-the-raspberry-pi-computer/). A dynamic IP address is therefore not ideal if we want to connect to say the Pi MySQL server instance from other devices (e.g. iPhone). We therefore wanted to establish a ‘static’ IP address for the Pi and to do this we need to dive under the bonnet. First move to and edit the network configuration file (‘nano’ is a text editor, the ‘sudo’ runs nano as the root user):
cd /etc/network
sudo nano interfaces
This interfaces file controls access to the various networking interfaces the Pi can use. There is a LOT of discussion on the web of different configurations people use – with varying degrees of success reported. Editing this file must be undertaken carefully – we certainly suggest taking a backup first! To cut a long story short, and following a fair bit of frustration, the following configuration file worked for us:
# The loopback network interface
auto lo
iface lo inet loopback

# The primary wired network interface
auto eth0

# The wireless network interface
auto wlan0
iface wlan0 inet manual
wpa-roam /etc/wpa_supplicant/wpa_supplicant.conf

# Default connection
iface default inet static
address 192.168.1.100
network 192.168.0.0
netmask 255.255.255.0
gateway 192.168.1.1
Note the fixed IP address we wanted was 192.168.1.100 on our local subnet. Note also the ‘manual’ setting of the wlan0 network. This setting ensures the ‘/etc/wpa_supplicant/wpa_supplicant.conf’ file (created by the WiFi Config tool above) is read correctly. Lastly, the use of the default setting at the end for the IP address ensures that if the Pi connects, either by wired or wifi link, it still has the same fixed IP address. The original ‘dhcp’ setting line was removed. Note finally that blank lines are ignored and that ‘#’ symbol denotes a comment. Epilogue Configuring networks is clearly a complex subject, this post just highlights how we got ours working. There are lots of other examples online. Formal network interface documentation is also at http://www.debian.org/doc/manuals/debian-reference/ch05.en.html#_the_basic_syntax_of_etc_network_interfaces The Pi itself also has some standard configuration file examples, worth looking at, see ‘/usr/share/doc/ifupdown/examples/network-interfaces’, but the file is ‘gzipped’ up and needs unzipping to view it first, thus:
cd /usr/share/doc/ifupdown/examples
sudo cp network-interfaces.gz network-interfaces_examples.gz
sudo gunzip network-interfaces_examples.gz
sudo more network-interfaces_examples
We hope this helps you get your WiFi running smoothly!]]>