![]() Here on GeoThread, we have taken delivery of one of the new Raspberry Pi Zeros for some projects – so here is a blog on how we set it all up for some of the work we get up to at Cranfield University. We’ve had quite a few projects with these devices over the years – reported here on GeoThread, starting back in 2016 with the Raspberry Pi 3, with various tutorials presented. The Raspberry Pi Zero is the latest in the line of these excellent, inexpensive microcomputers, see https://www.raspberrypi.org/products/raspberry-pi-zero/. Following on from the Pi A and B series devices, the Zero is a great entry level machine for learning coding and software development. We have a Raspberry Pi Zero W – the ‘W’ meaning it also has wireless and Bluetooth connectivity.
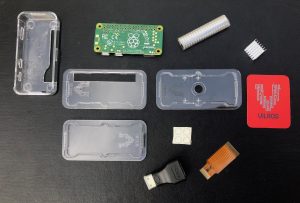
To get us going, we bought a kit that contained not only the Pi, but also an acrylic case and a power supply. There are many such kits available – we selected the Vilros offering. We also bought the new Raspberry Pi Camera v2 to fit in the case.
[caption id="attachment_1492" width="300"]
Here on GeoThread, we have taken delivery of one of the new Raspberry Pi Zeros for some projects – so here is a blog on how we set it all up for some of the work we get up to at Cranfield University. We’ve had quite a few projects with these devices over the years – reported here on GeoThread, starting back in 2016 with the Raspberry Pi 3, with various tutorials presented. The Raspberry Pi Zero is the latest in the line of these excellent, inexpensive microcomputers, see https://www.raspberrypi.org/products/raspberry-pi-zero/. Following on from the Pi A and B series devices, the Zero is a great entry level machine for learning coding and software development. We have a Raspberry Pi Zero W – the ‘W’ meaning it also has wireless and Bluetooth connectivity.
To get us going, we bought a kit that contained not only the Pi, but also an acrylic case and a power supply. There are many such kits available – we selected the Vilros offering. We also bought the new Raspberry Pi Camera v2 to fit in the case.
[caption id="attachment_1492" width="300"]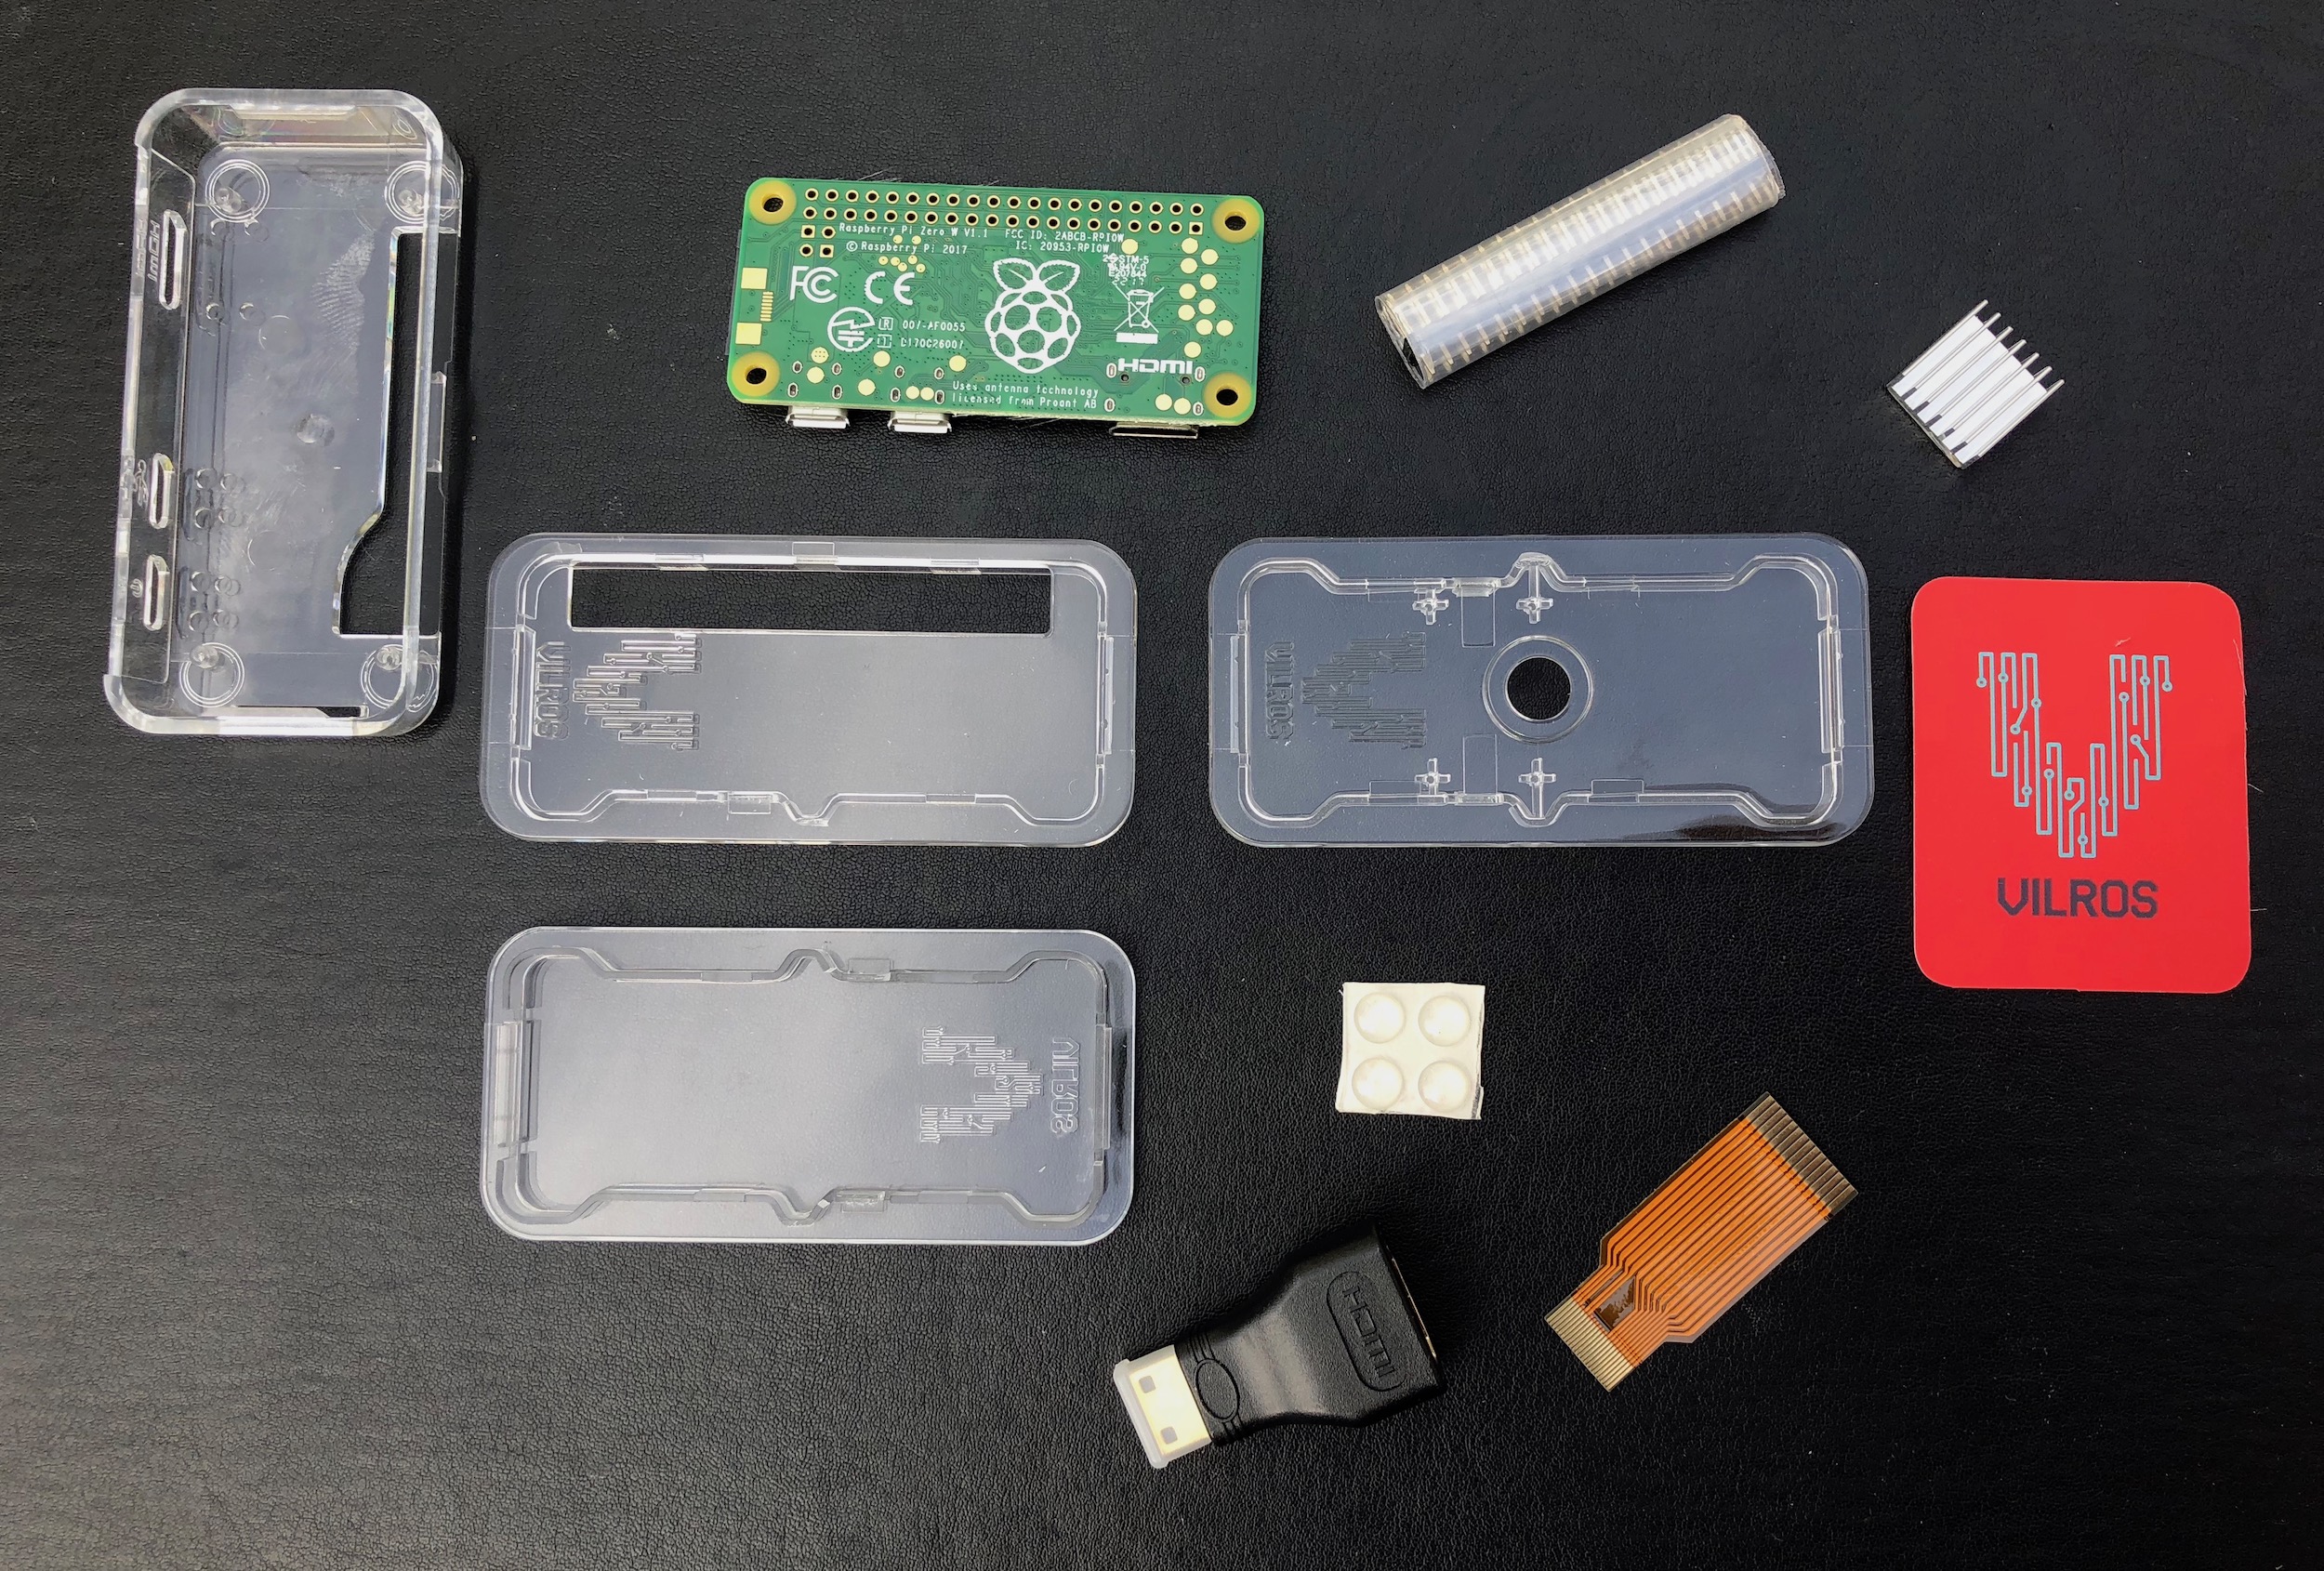 Raspberry Pi Zero, Vilros Starter Kit[/caption]Note that we have also bought (shown at the bottom centre), an HDMI Mini Type C (male) to HDMI Normal Type A (female) Monitor Cable Display Adapter – the Raspberry Pi Zero only has a HDMI Mini socket. In addition, you may also need to buy a single (or dual) Micro USB Male To USB 2.0 Female OTG (USB On the Go) cable for connecting a USB keyboard (or a USB keyboard and mouse). The HDMI and USB cables/adapters are to be used to get the unit up and running in the first instance, using a keyboard, mouse and monitor. Once the configuration is complete and the WiFi is connected, we will run the Raspberry Pi remotely and so disconnect the keyboard and screen.
We also bought one of the new ‘version 2’ cameras for the Raspberry Pi. This is an 8MPixel camera made by Sony, and a huge improvement over the original camera. It can fit into the case. The case has three alternative lids – shown here is the version with the camera mounting and aperture built in.
[caption id="attachment_1494" width="300"]
Raspberry Pi Zero, Vilros Starter Kit[/caption]Note that we have also bought (shown at the bottom centre), an HDMI Mini Type C (male) to HDMI Normal Type A (female) Monitor Cable Display Adapter – the Raspberry Pi Zero only has a HDMI Mini socket. In addition, you may also need to buy a single (or dual) Micro USB Male To USB 2.0 Female OTG (USB On the Go) cable for connecting a USB keyboard (or a USB keyboard and mouse). The HDMI and USB cables/adapters are to be used to get the unit up and running in the first instance, using a keyboard, mouse and monitor. Once the configuration is complete and the WiFi is connected, we will run the Raspberry Pi remotely and so disconnect the keyboard and screen.
We also bought one of the new ‘version 2’ cameras for the Raspberry Pi. This is an 8MPixel camera made by Sony, and a huge improvement over the original camera. It can fit into the case. The case has three alternative lids – shown here is the version with the camera mounting and aperture built in.
[caption id="attachment_1494" width="300"]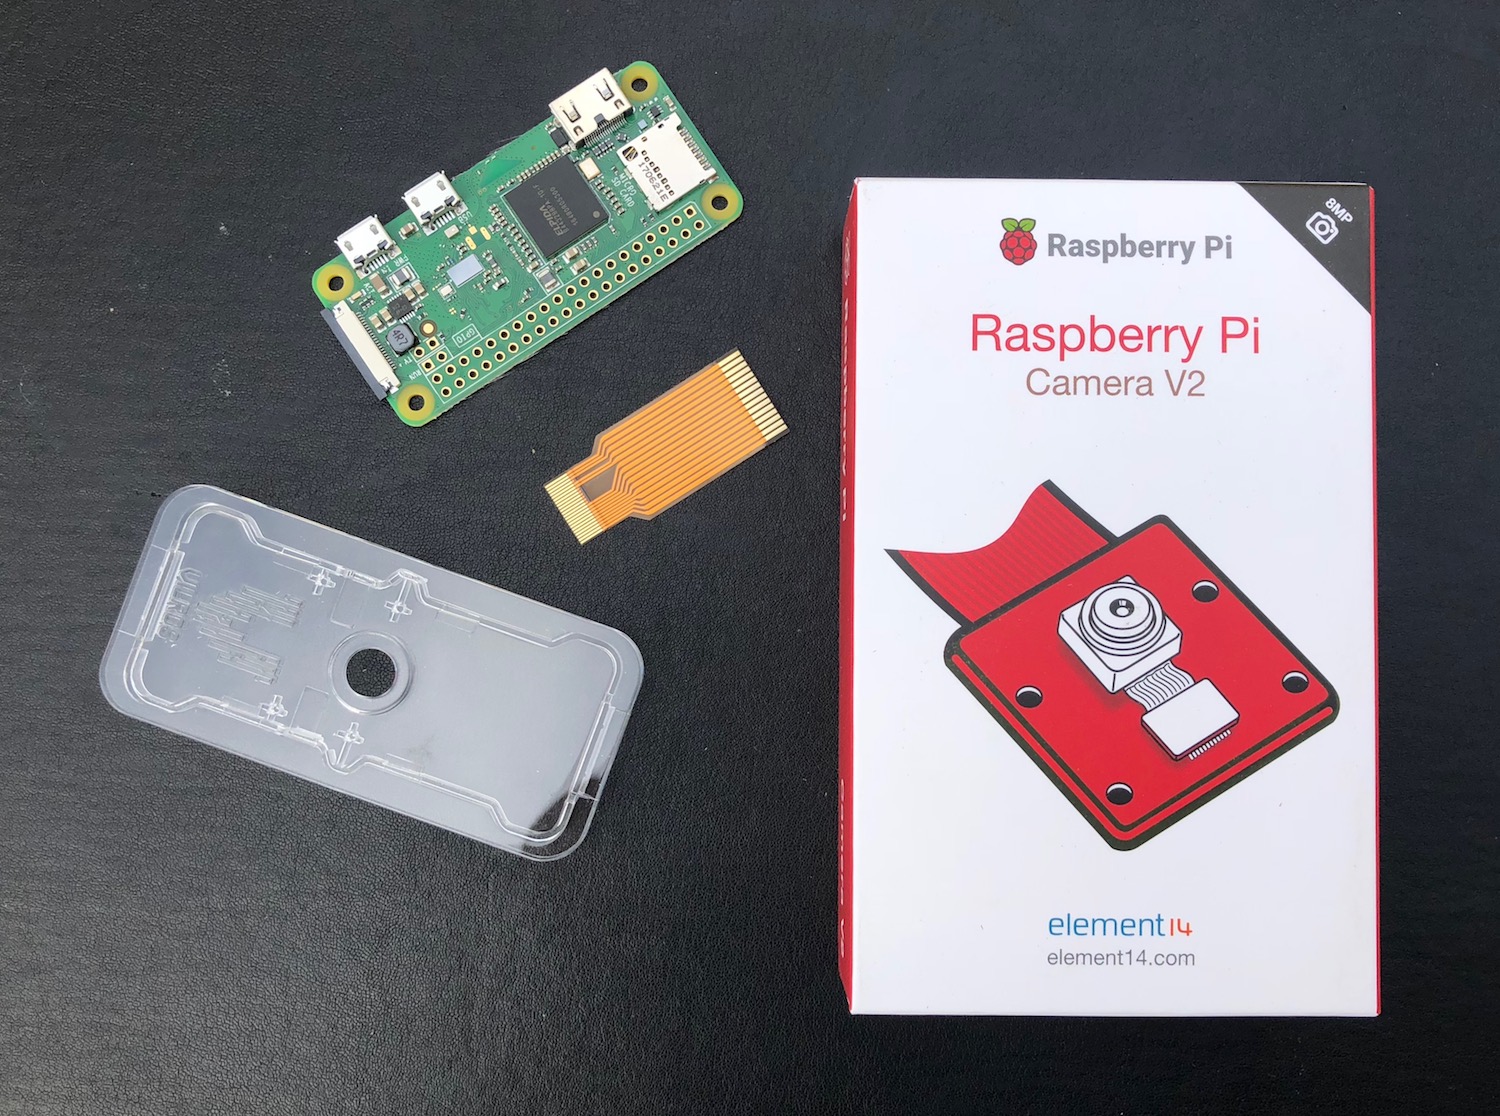 Raspberry Pi Zero and unboxing the camera v2[/caption]One thing to note immediately is that the Raspberry Pi Zero has a different camera cable connector size to the earlier models of the Pi. This means that you will need to obtain a new ribbon cable connector to replace the one provided. You can easily buy these separately, but the Vilros kit (like other kits) thoughtfully provide this.
[caption id="attachment_1498" align="alignnone" width="300"]
Raspberry Pi Zero and unboxing the camera v2[/caption]One thing to note immediately is that the Raspberry Pi Zero has a different camera cable connector size to the earlier models of the Pi. This means that you will need to obtain a new ribbon cable connector to replace the one provided. You can easily buy these separately, but the Vilros kit (like other kits) thoughtfully provide this.
[caption id="attachment_1498" align="alignnone" width="300"]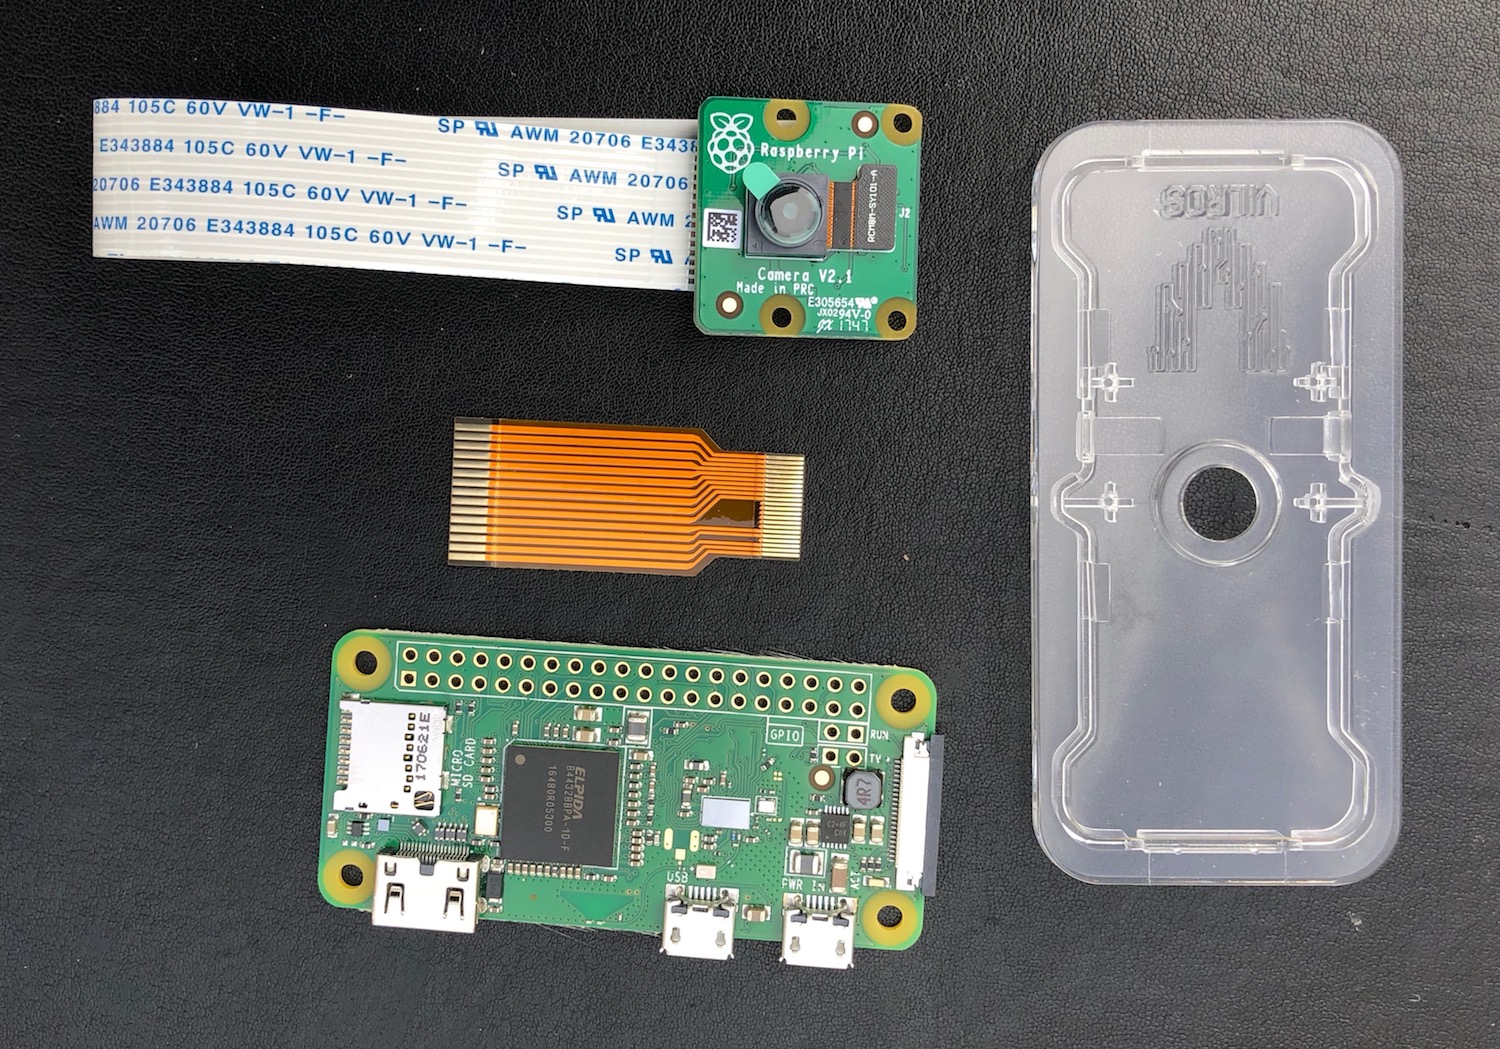 Raspberry Pi Zero Camera v2 and case[/caption][caption id="attachment_1518" align="alignright" width="194"]
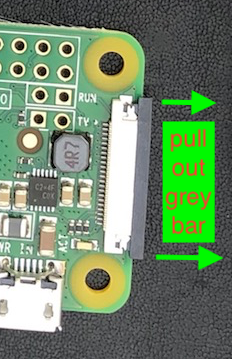 Raspberry Pi Zero camera socket[/caption]The camera fixing has a small plastic bar that can be gently prised outwards to allow the old connector ribbon cable to be slipped out. The new cable can then be slotted in and the plastic bar pushed back into place to secure it. Be sure to insert the cable the right way up to allow contact.This is a delicate operation, but the cable is reasonably robust.
[caption id="attachment_1497" align="alignnone" width="214"]
Raspberry Pi Zero camera socket[/caption]The camera fixing has a small plastic bar that can be gently prised outwards to allow the old connector ribbon cable to be slipped out. The new cable can then be slotted in and the plastic bar pushed back into place to secure it. Be sure to insert the cable the right way up to allow contact.This is a delicate operation, but the cable is reasonably robust.
[caption id="attachment_1497" align="alignnone" width="214"]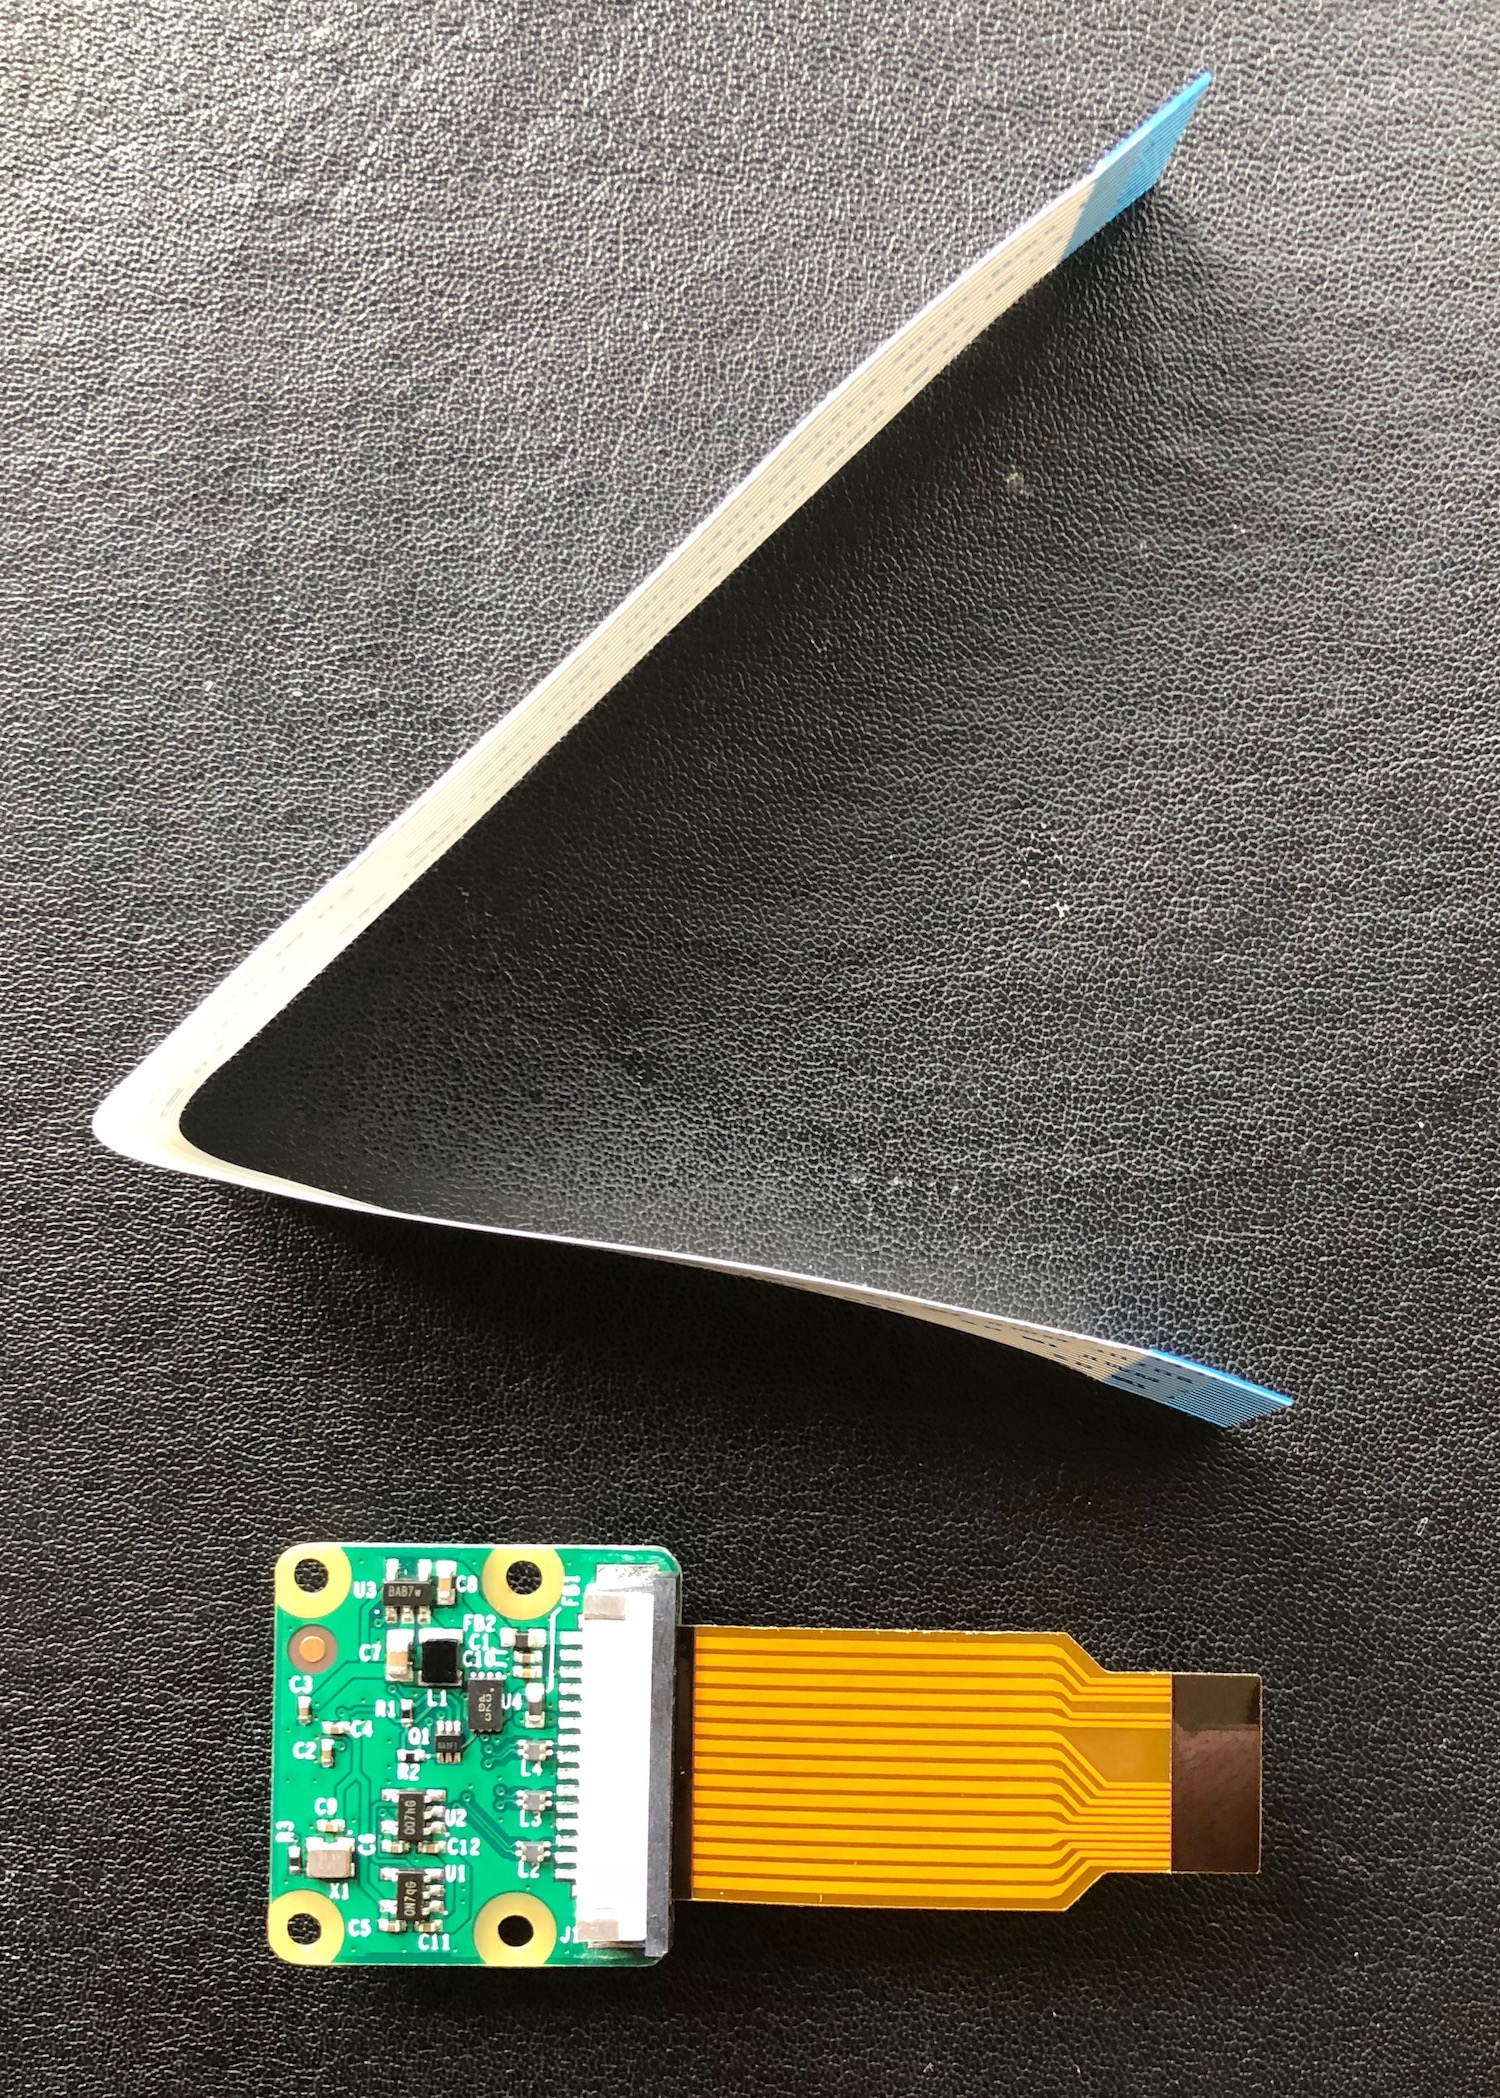 Raspberry Pi Zero Camera v2 ribbon cables[/caption]In the image above, the old connector has been removed, and the new one inserted. Note the new connector is very short, allowing it to be fitted inside the case. We are nearly ready to assemble the parts together in the case.
[caption id="attachment_1500" align="alignnone" width="247"]
Raspberry Pi Zero Camera v2 ribbon cables[/caption]In the image above, the old connector has been removed, and the new one inserted. Note the new connector is very short, allowing it to be fitted inside the case. We are nearly ready to assemble the parts together in the case.
[caption id="attachment_1500" align="alignnone" width="247"]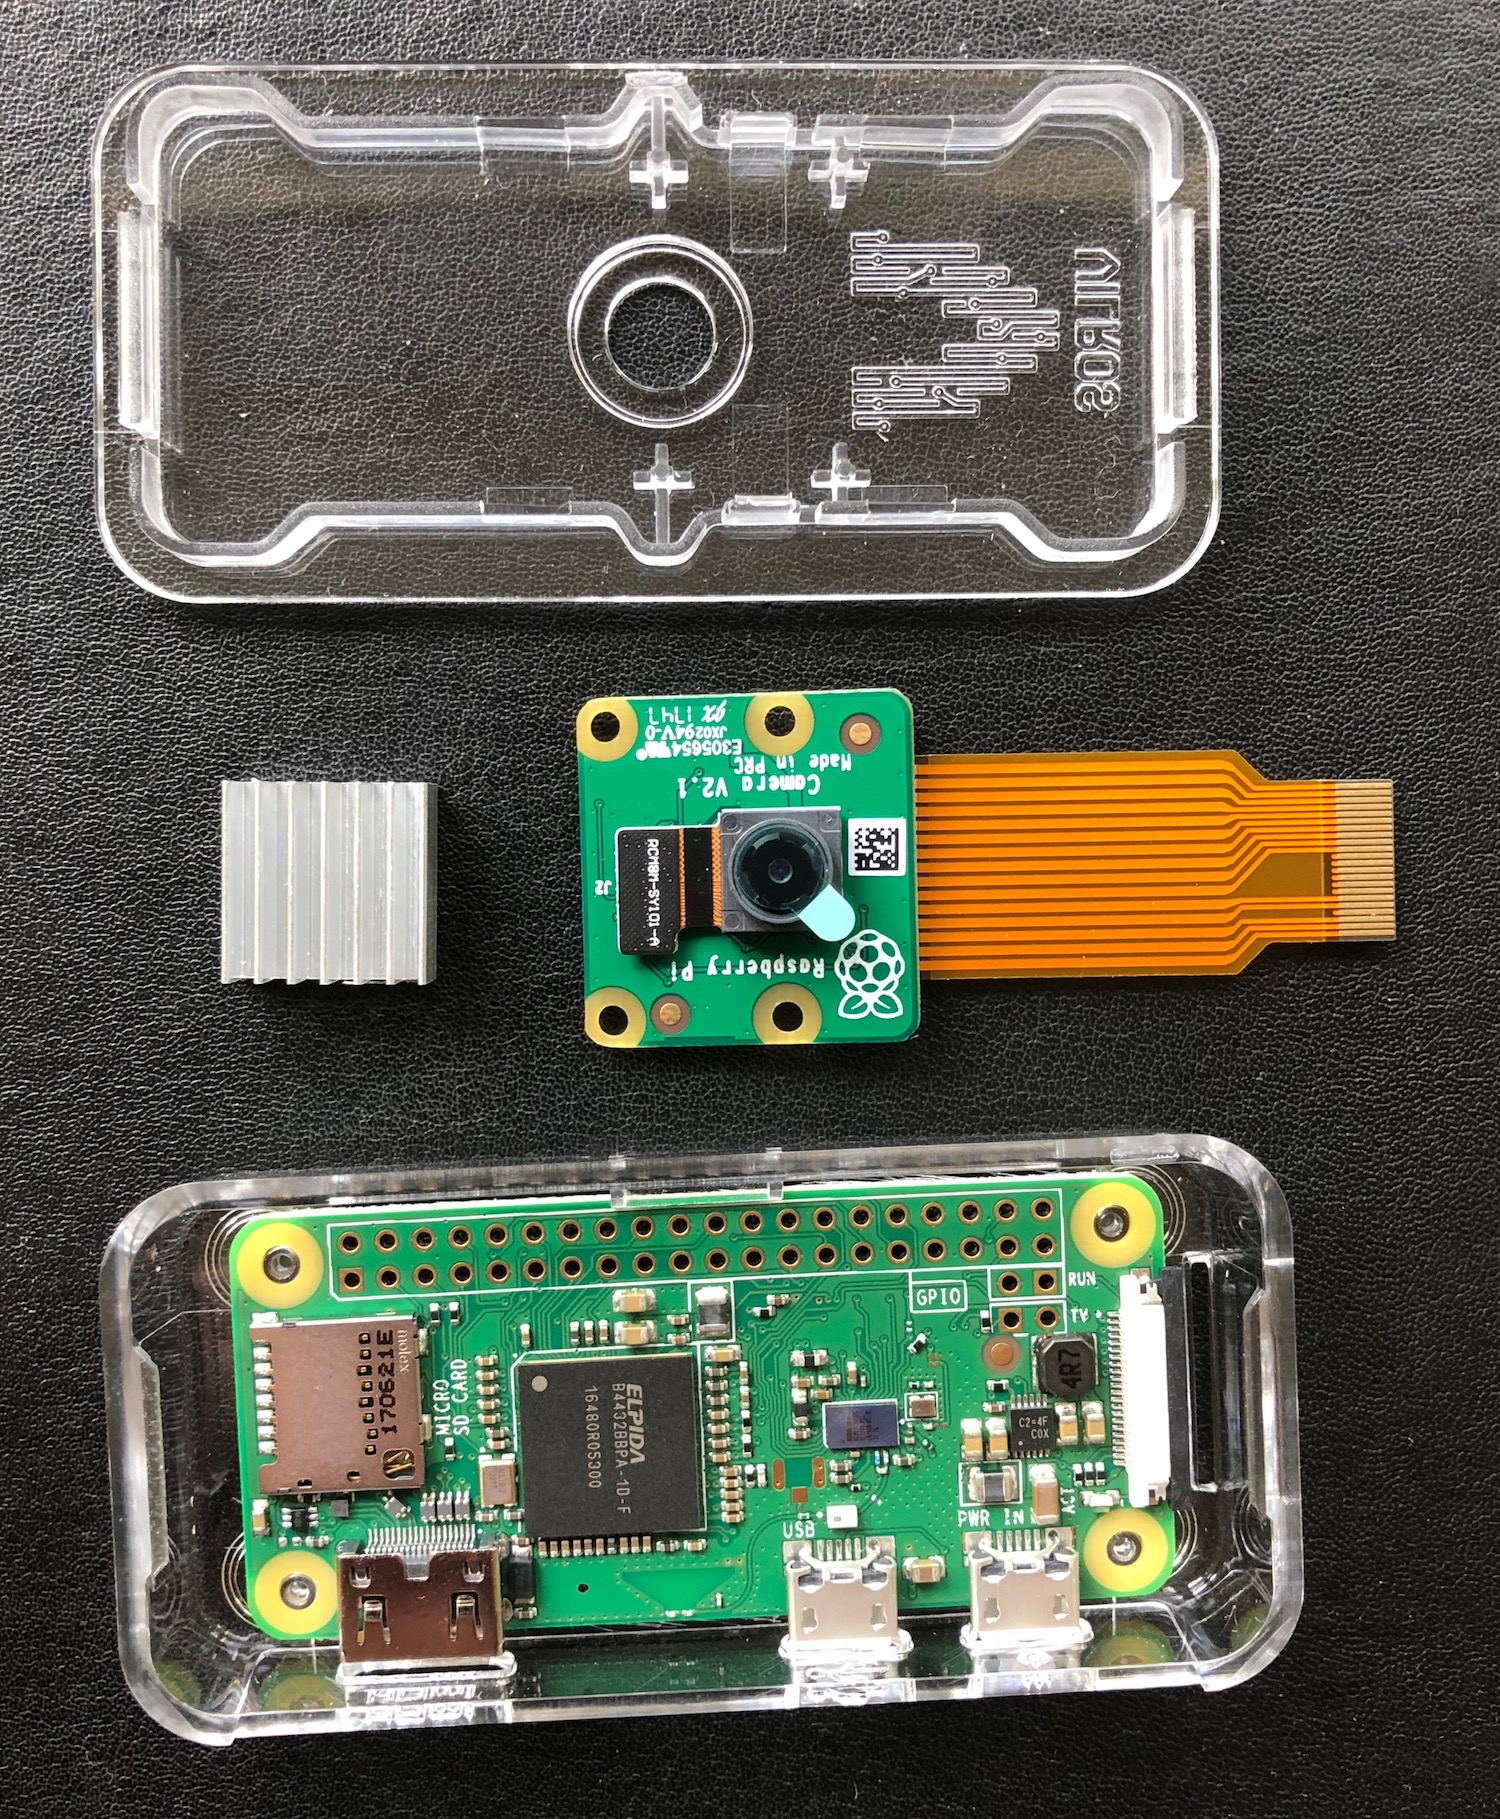 Raspberry Pi Zero Case Camera v2 – ready for fitting[/caption]The camera, with its new connector, can now be fitted to the Raspberry Pi Zero. The Zero has another plastic clip for slotting in the ribbon cable. As before, prise away the locking bar and gently insert the cable. When tightly fitted (the right way up to allow contact again), the bar can be pushed back in to grip the cable in place.
[caption id="attachment_1502" align="alignnone" width="253"]
Raspberry Pi Zero Case Camera v2 – ready for fitting[/caption]The camera, with its new connector, can now be fitted to the Raspberry Pi Zero. The Zero has another plastic clip for slotting in the ribbon cable. As before, prise away the locking bar and gently insert the cable. When tightly fitted (the right way up to allow contact again), the bar can be pushed back in to grip the cable in place.
[caption id="attachment_1502" align="alignnone" width="253"]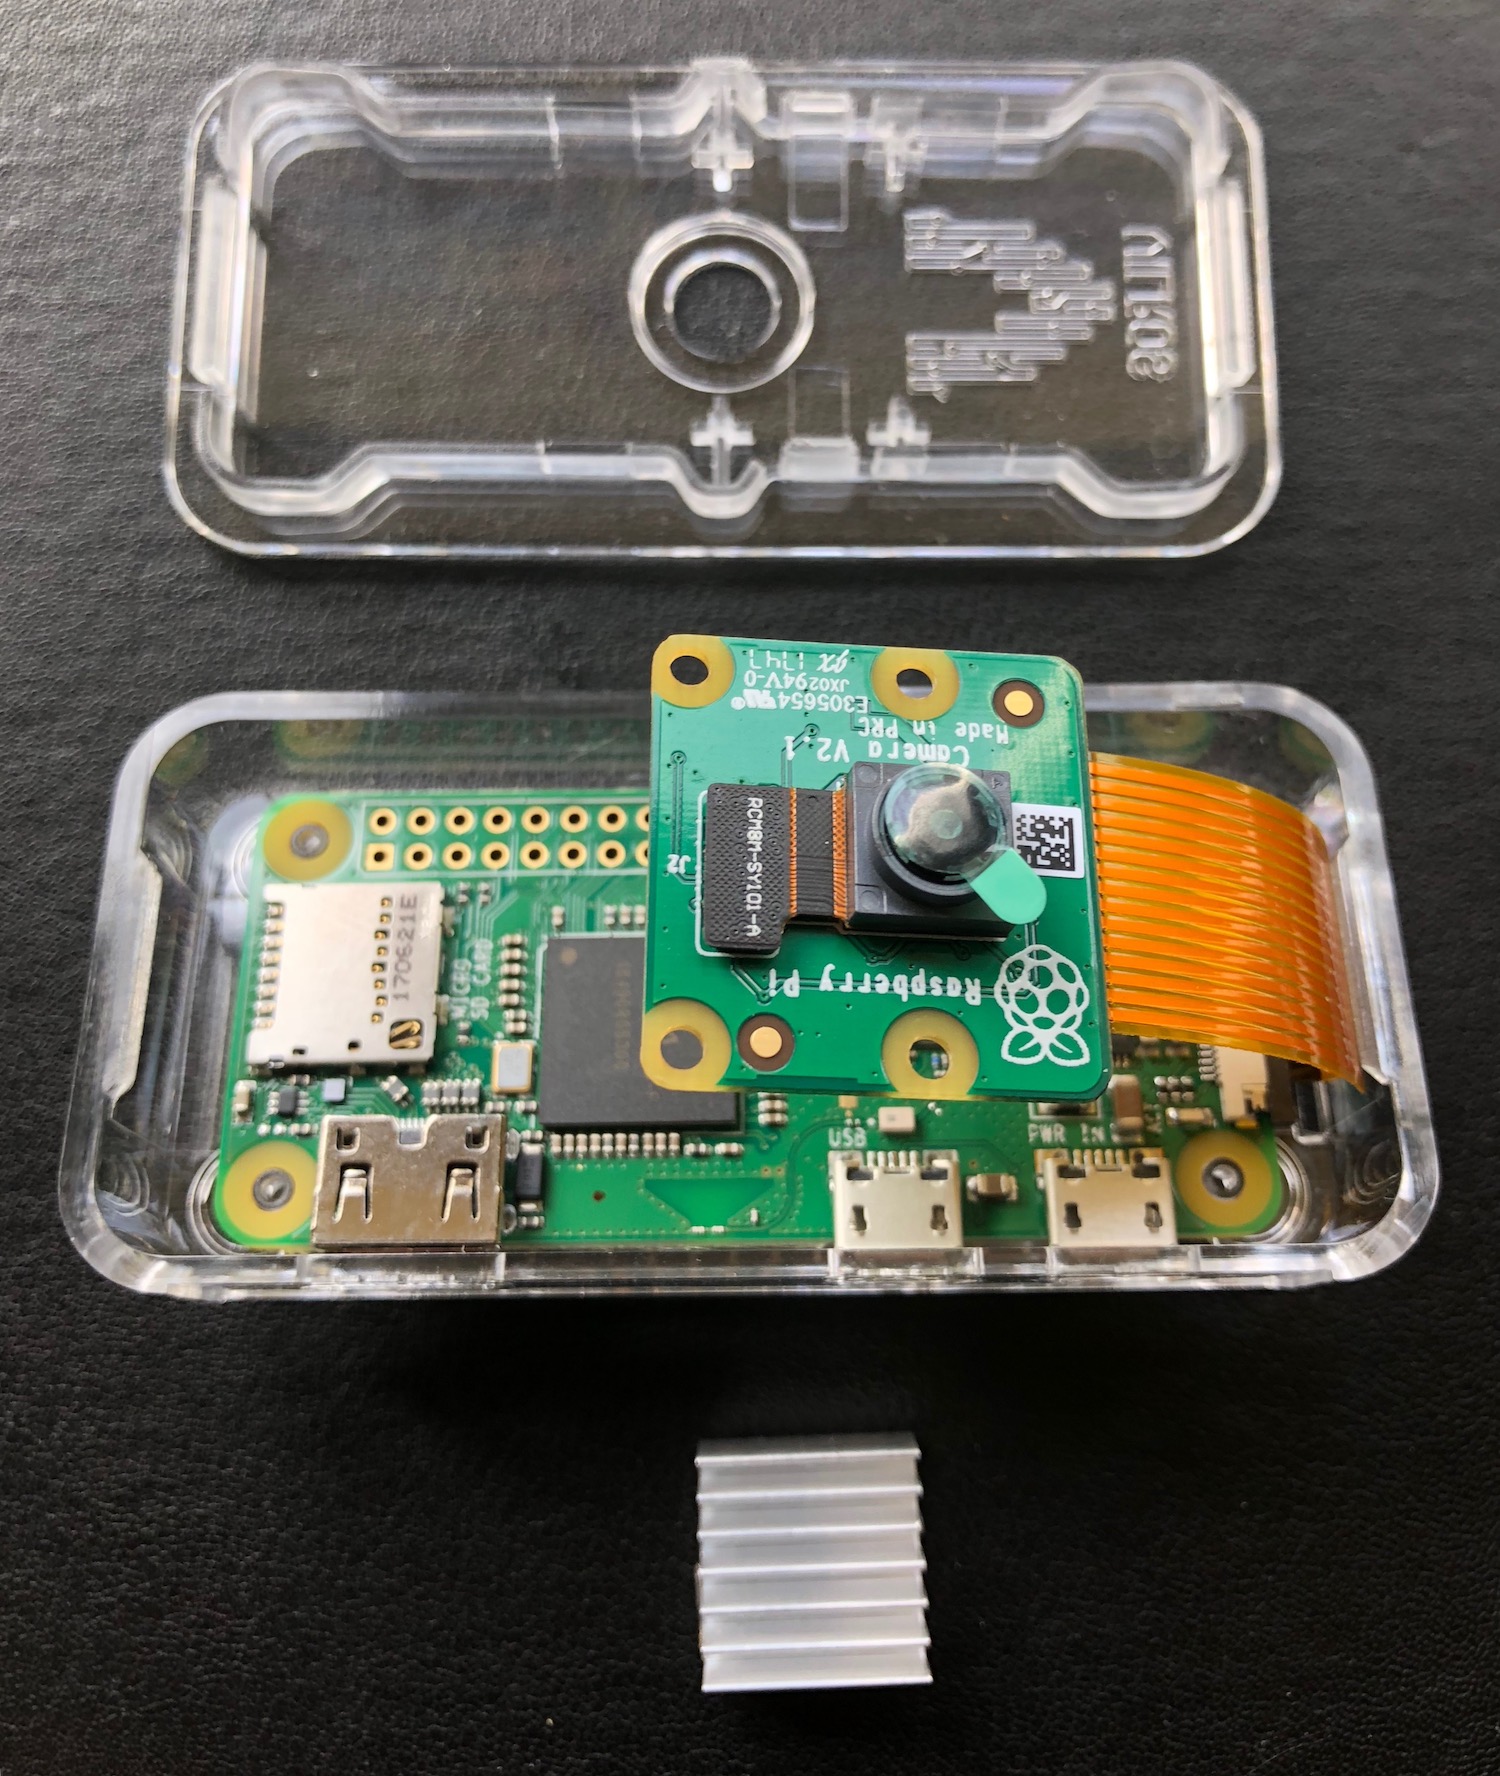 Raspberry Pi Zero Case Camera v2 – fitting the camera into the case[/caption]Once fitted, the case can be put together. Note that the Vilros kit comes with a small heatsink that can be fitted to the Pi to cool the 1GHz ARM CPU chip. However, with the camera fitted in the case, there is no room for the heatsink also. Time will tell if that is an issue!
[caption id="attachment_1503" align="alignnone" width="300"]
Raspberry Pi Zero Case Camera v2 – fitting the camera into the case[/caption]Once fitted, the case can be put together. Note that the Vilros kit comes with a small heatsink that can be fitted to the Pi to cool the 1GHz ARM CPU chip. However, with the camera fitted in the case, there is no room for the heatsink also. Time will tell if that is an issue!
[caption id="attachment_1503" align="alignnone" width="300"]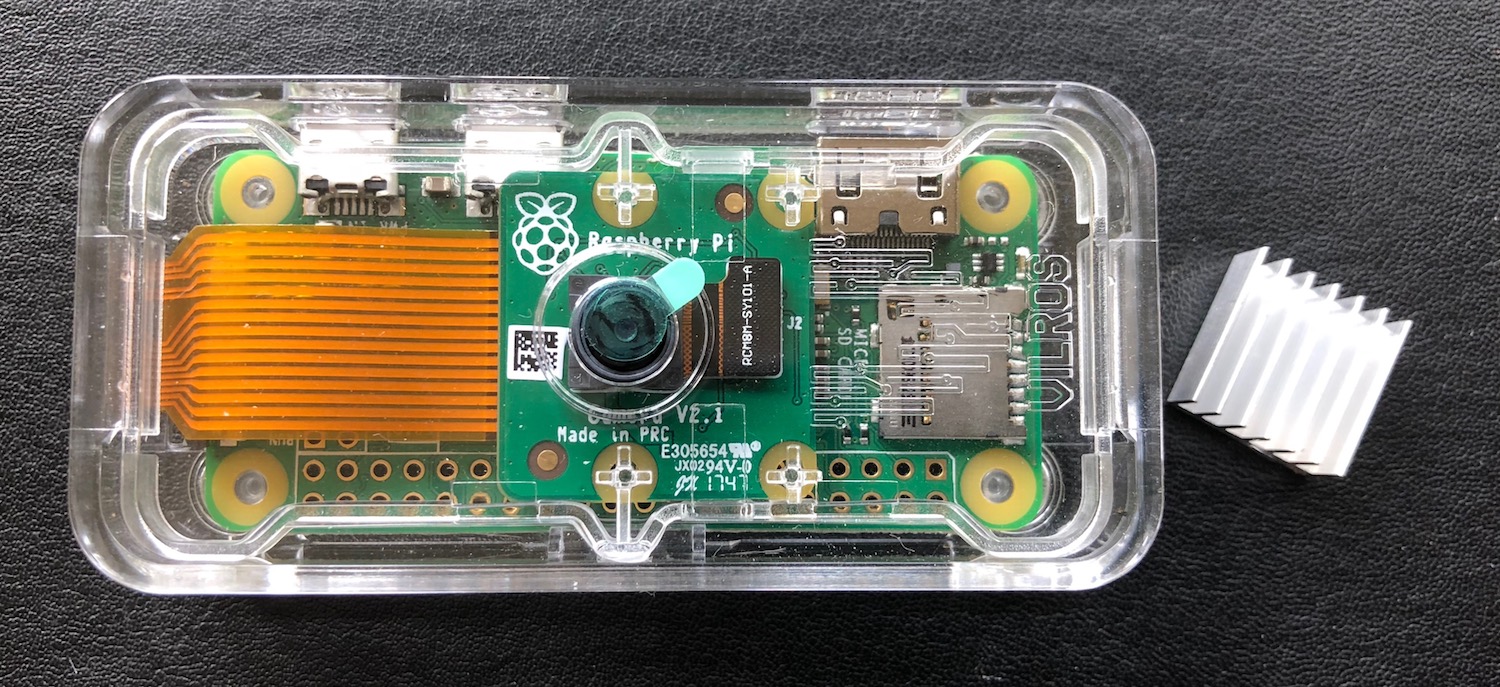 Raspberry Pi Zero Case and Camera v2, fully Assembled[/caption]The Vilros kit comes with the power supply, fitted with the customary MicroUSB plug.
[caption id="attachment_1506" align="alignnone" width="300"]
Raspberry Pi Zero Case and Camera v2, fully Assembled[/caption]The Vilros kit comes with the power supply, fitted with the customary MicroUSB plug.
[caption id="attachment_1506" align="alignnone" width="300"]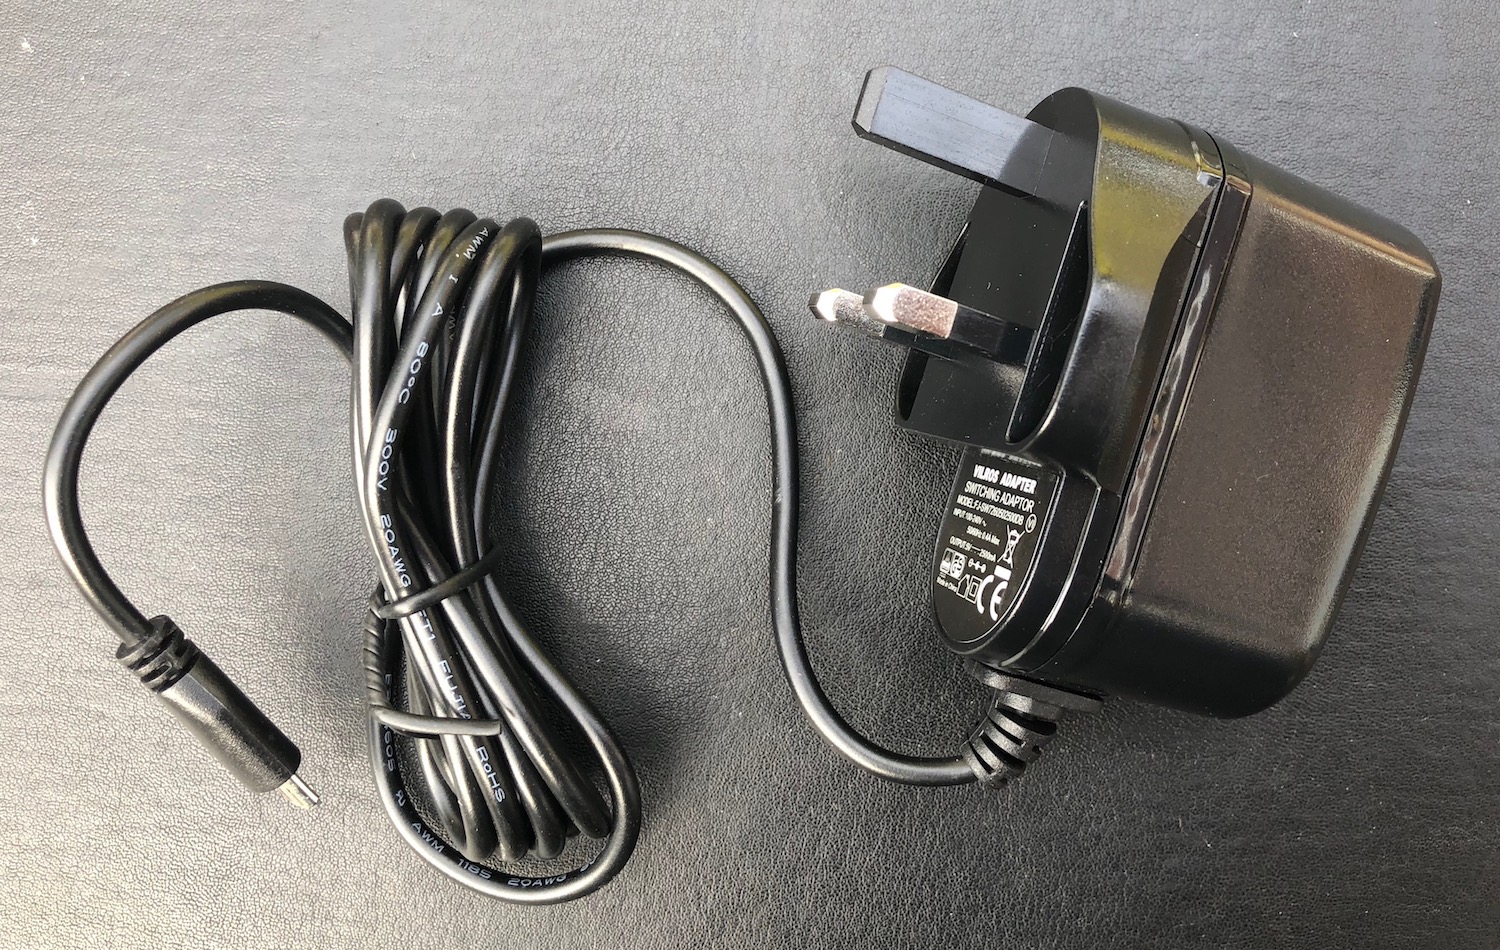 Raspberry Pi Zero Power Supply[/caption]Note that the power socket is the socket to the right, as shown.
[caption id="attachment_1507" align="alignnone" width="300"]
Raspberry Pi Zero Power Supply[/caption]Note that the power socket is the socket to the right, as shown.
[caption id="attachment_1507" align="alignnone" width="300"]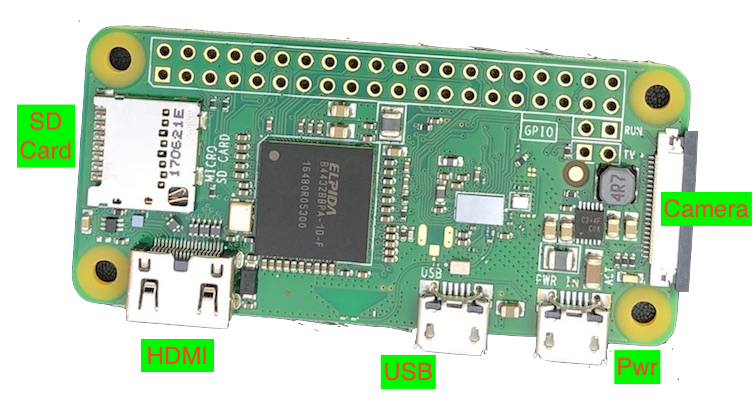 Raspberry Pi Zero sockets[/caption]Before the case can be clicked into place, there is one last thing needed – the operating system. This is installed on an SD card.
We followed the very clear instructions on the Raspberry Pi website, here https://projects.raspberrypi.org/en/projects/raspberry-pi-setting-up/3. We downloaded the latest Raspbian img file and flashed it onto a new Micro-SD card. To do this on a MacBook Pro, we used the Etcher app (v1.4.4).
[caption id="attachment_1521" align="alignnone" width="300"]
Raspberry Pi Zero sockets[/caption]Before the case can be clicked into place, there is one last thing needed – the operating system. This is installed on an SD card.
We followed the very clear instructions on the Raspberry Pi website, here https://projects.raspberrypi.org/en/projects/raspberry-pi-setting-up/3. We downloaded the latest Raspbian img file and flashed it onto a new Micro-SD card. To do this on a MacBook Pro, we used the Etcher app (v1.4.4).
[caption id="attachment_1521" align="alignnone" width="300"] SD card Flashing with Etcher[/caption]Once the Micro SD card was flashed (e.g. the img file was copied onto it with Etcher), we could insert it carefully into the SD socket on the Raspberry Pi Zero. At this point the case was all clipped together.
We are now ready for the next stage of the project!]]>
SD card Flashing with Etcher[/caption]Once the Micro SD card was flashed (e.g. the img file was copied onto it with Etcher), we could insert it carefully into the SD socket on the Raspberry Pi Zero. At this point the case was all clipped together.
We are now ready for the next stage of the project!]]>
Setting up a Raspberry Pi Zero W